Bike Style Showdown: Vintage vs. Modern Models

Step into the captivating world of bike styles and experience the timeless debate of Vintage vs. Modern models. Which style will steal your heart – the classic elegance of vintage bikes or the cutting-edge innovation of modern models? Find out as we explore the unique charm and features of each to help you discover the perfect ride that suits your style preferences.

Unveiling the Timeless Debate: Vintage vs. Modern Bike Styles

When it comes to choosing a bike that reflects your personal style and preferences, the age-old debate between vintage and modern models comes into play. Each style has its unique charm and appeal, catering to different needs and tastes. In this bike style showdown, we delve into the distinctive features of vintage and modern bikes to help you make an informed decision on which type suits you best.

Vintage Bikes: Nostalgia on Wheels

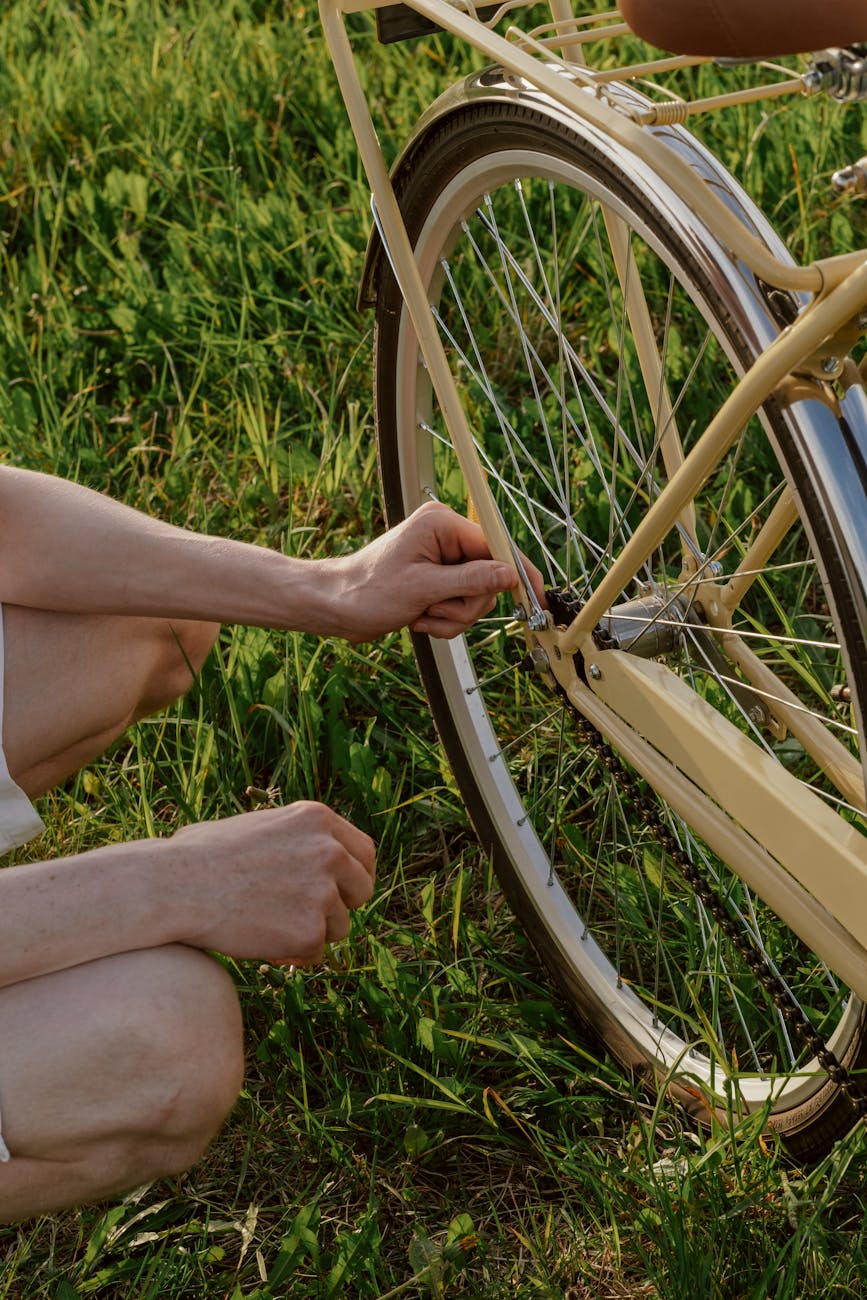
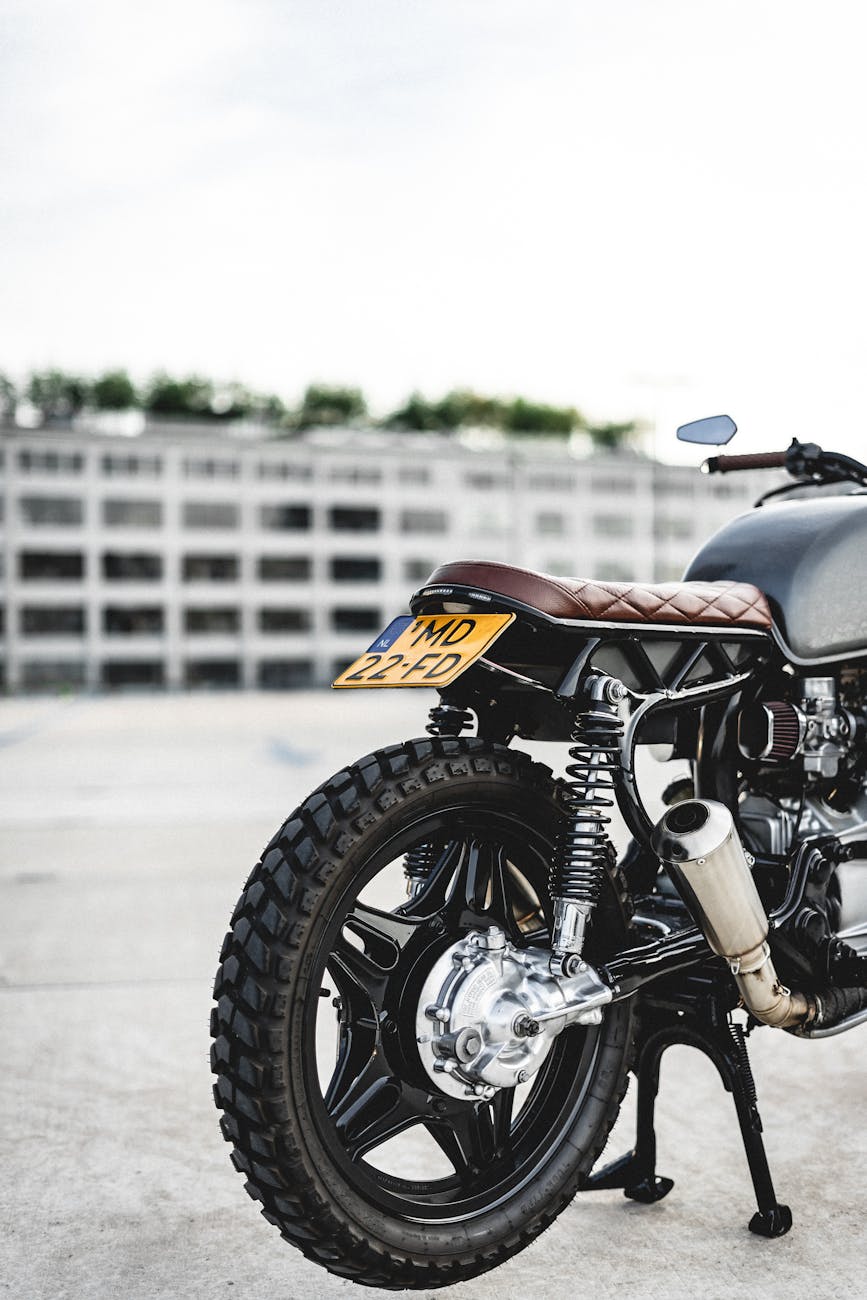
Vintage bikes exude a sense of nostalgia and timeless elegance that many cycling enthusiasts find irresistible. These classic beauties harken back to an era when craftsmanship and meticulous details defined the biking experience. From their lugged steel frames to their intricate lug work and timeless color schemes, vintage bikes are a symbol of craftsmanship and history. Riding a vintage bike not only transports you back in time but also makes a bold style statement wherever you go.

Modern Models: Innovation and Performance

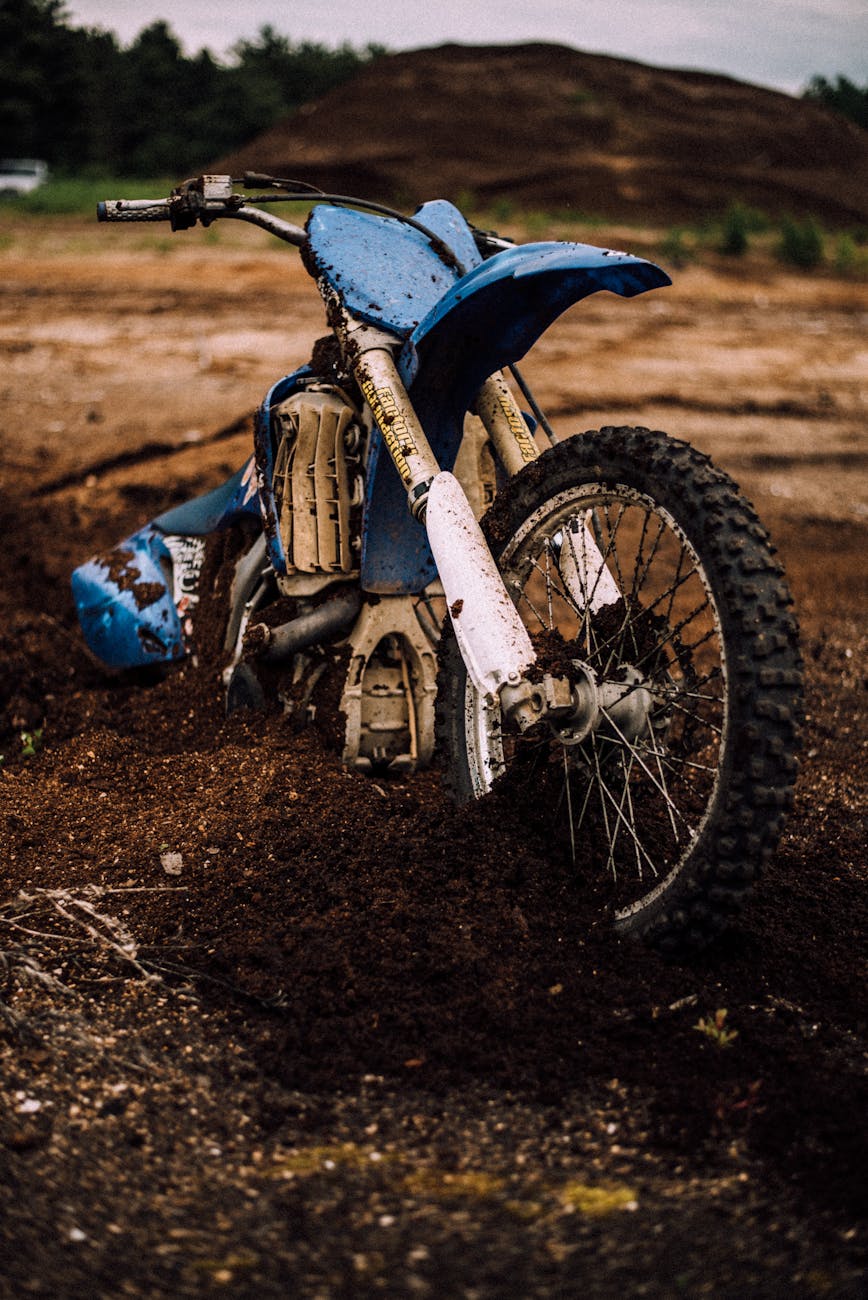
On the other hand, modern bikes represent the pinnacle of innovation and performance in the cycling world. With cutting-edge materials, advanced engineering, and sleek designs, modern bikes offer unmatched speed, agility, and comfort. Whether you’re a serious cyclist looking to conquer challenging terrains or a casual rider seeking a smooth and efficient commute, modern bikes are designed to enhance your cycling experience in every way possible.

The Aesthetics Battle: Exquisite Elegance vs. Sleek Modernity

When it comes to aesthetics, vintage bikes and modern models present contrasting styles that cater to different tastes. Vintage bikes boast a retro charm with their timeless designs, intricate details, and classic color palettes that evoke a sense of old-world elegance. On the other hand, modern bikes showcase a minimalist and sleek appearance, with aerodynamic frames, bold color schemes, and futuristic designs that exude a sense of speed and agility. Whether you prefer the graceful curves of a vintage bike or the sharp lines of a modern model, your choice ultimately boils down to your personal style preferences.

Comfort and Ride Quality: Tradition vs. Technology

Vintage bikes are known for their steel frames, which offer a smooth and comfortable ride, making them ideal for leisurely cruising and relaxed cycling journeys. Their timeless design and ergonomic geometry prioritize comfort and stability, ensuring a pleasant riding experience for hours on end. In contrast, modern bikes often feature lightweight materials such as carbon fiber and advanced suspension systems that prioritize speed, performance, and responsiveness. These technological advancements translate to a dynamic riding experience, perfect for enthusiasts seeking adrenaline-pumping rides and competitive cycling.

Maintenance and Durability: Classic Longevity vs. Modern Upkeep

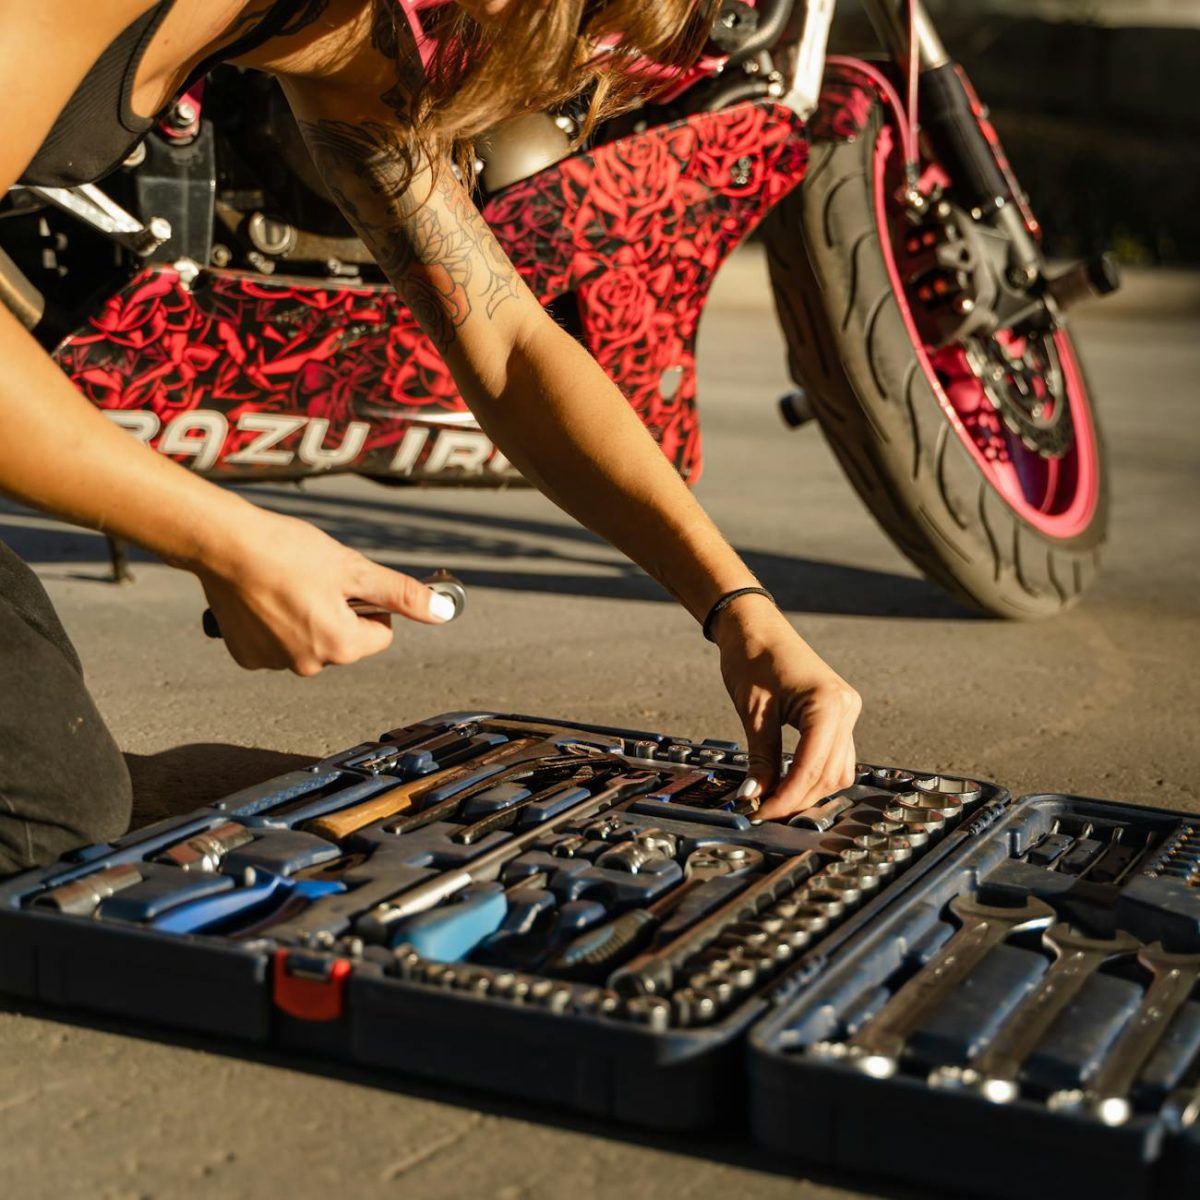
When it comes to maintenance and durability, vintage bikes have a reputation for their robust build quality and longevity. With minimalistic components and simple mechanical systems, vintage bikes are easy to maintain and repair, making them an excellent choice for DIY enthusiasts and retro bike lovers. On the other hand, modern bikes, with their complex components and advanced technologies, may require specialized maintenance and expert servicing to ensure optimal performance and longevity. While modern bikes offer cutting-edge features and performance enhancements, they also come with higher maintenance costs and the need for regular upkeep.

Choosing Your Style: Finding the Perfect Fit

In the end, whether you opt for a vintage bike or a modern model depends on your personal preferences, riding style, and intended use. If you appreciate timeless elegance, classic aesthetics, and a laid-back cycling experience, a vintage bike might be the perfect choice for you. On the other hand, if you seek innovation, speed, and performance-driven features, a modern bike could be the ideal companion for your cycling adventures. Whichever style you choose, both vintage and modern bikes have their unique charm and appeal, offering a delightful riding experience tailored to your individual tastes and preferences.

Conclusion: Embracing the Best of Both Worlds

In the ultimate bike style showdown between vintage and modern models, it’s clear that each style brings something special to the table. Whether you’re drawn to the nostalgia and elegance of vintage bikes or the innovation and performance of modern models, both styles have their place in the cycling world. Embrace the best of both worlds by exploring the diverse range of vintage and modern bikes available, and find the perfect style that resonates with your cycling spirit. In the end, it’s not about choosing between vintage and modern—it’s about celebrating the rich diversity of biking styles and finding the perfect ride that speaks to your heart and soul.

As you embark on your cycling journey, remember that whether you’re cruising on a vintage beauty or racing on a cutting-edge modern machine, the joy of cycling lies in the freedom, adventure, and pure exhilaration that comes with every pedal stroke. So, saddle up, pick your style, and embark on unforgettable biking adventures that will take you on a thrilling ride through time and technology.

Happy cycling!

Bike Fit: Discover the Ultimate Test Ride Tips

Embark on your cycling journey with confidence by mastering these essential **bike fit tips**. Discover how achieving the perfect fit can elevate your comfort, performance, and safety on the road. Gear up for an enjoyable ride with our ultimate test ride tips!

Cycling is a fantastic way to stay active, explore new places, and enjoy the outdoors. However, one crucial aspect that often gets overlooked is bike fit. Having the right bike fit is essential for comfort, efficiency, and injury prevention. Whether you are a seasoned cyclist or a beginner, ensuring your bike is set up correctly can make a world of difference in your riding experience. In this article, we will delve into the importance of bike fit and provide you with some ultimate test ride tips to help you achieve the perfect fit for an enjoyable and safe ride.

The Importance of Bike Fit

Before hitting the road on your bike, it’s vital to understand why bike fit matters. A proper bike fit can prevent discomfort, pain, and potential injuries that may arise from riding a poorly fitted bike. When your bike is correctly adjusted to your body measurements, you can pedal more efficiently, maintain proper posture, and reduce strain on your muscles and joints. A bike fit can also enhance your performance by optimizing power transfer and aerodynamics, allowing you to ride faster and longer with less effort.

Factors to Consider for Bike Fit

When it comes to bike fit, several factors need to be taken into account to achieve the optimum setup. These include saddle height, saddle position, handlebar reach, handlebar height, and cleat alignment. Adjusting these components to fit your body’s geometry and riding style can significantly impact your comfort and performance on the bike. A professional bike fit specialist can help you fine-tune these adjustments based on your individual needs and riding goals.

Ultimate Test Ride Tips

Now that you understand the importance of bike fit and the key factors to consider, it’s time to put your knowledge to the test with some ultimate test ride tips.

1. Start Slow: Begin your test ride at a relaxed pace to give yourself time to adjust to the bike’s setup and feel any discomfort or issues that may arise.

2. Pay Attention to Comfort: Focus on how comfortable you feel on the bike. Note any areas of discomfort, such as pressure points on the saddle, strain on your neck or wrists, or knee pain.

3. Test Different Positions: Experiment with different positions on the bike, such as sitting upright, riding in the drops, or adjusting your hand placement on the handlebars to find the most comfortable and efficient setup.

4. Check Your Pedaling: Pay attention to your pedaling technique and efficiency. Ensure that your saddle height is correct to prevent your knees from overextending or bending too much during each pedal stroke.

5. Evaluate Handling and Stability: Test the bike’s handling and stability by riding on different surfaces and terrains. Make sure the bike feels responsive and stable under varying conditions.

6. Listen to Your Body: Listen to your body’s feedback during the test ride. If you experience any discomfort, pain, or numbness, take note and make adjustments before heading out for a longer ride.

Conclusion

In conclusion, bike fit plays a crucial role in your cycling experience, affecting your comfort, performance, and overall enjoyment on the bike. By understanding the importance of bike fit, considering key factors, and following the ultimate test ride tips, you can ensure that your bike is properly adjusted to your body and riding style. Investing time in getting the right bike fit can lead to a more enjoyable and rewarding cycling journey. So, before you embark on your next cycling adventure, remember to prioritize your bike fit for a smoother and more comfortable ride.

Terrain-Specific Bike Tire Guide: Effortless Choices for Optimal Performance

Choosing the perfect terrain-specific bike tires can make all the difference in your cycling experience. From smooth pavements to off-road adventures, selecting the right tires tailored to specific terrains ensures optimal performance, grip, and safety on every ride. Elevate your cycling game with our detailed guide on the best terrain-specific bike tires for effortless choices and enhanced riding pleasure.

Unveiling the Best Terrain-Specific Bike Tires for Optimal Performance

When it comes to enhancing your cycling experience, choosing the right bike tires tailored to specific terrains is crucial. The terrain you predominantly ride on greatly influences your cycling performance, comfort, and safety. With a multitude of options available in the market, selecting the ideal tire for your riding needs can be a daunting task. To simplify this process and help you make effortless choices, we have compiled a comprehensive guide on terrain-specific bike tires that will elevate your performance and riding pleasure.

Understanding Terrain-Specific Bike Tires

Before delving into the specifics of terrain-specific bike tires, it is essential to understand their significance. Bike tires are designed with varying tread patterns, rubber compounds, and construction to perform optimally on different surfaces. By choosing tires that are tailored to specific terrains, you can maximize your grip, traction, and efficiency, resulting in a smoother and more enjoyable ride.

Road Tires for Smooth Pavements

For cyclists who primarily ride on smooth pavements or roads, road bike tires are the ideal choice. These tires feature a slick tread pattern that minimizes rolling resistance and ensures excellent grip on paved surfaces. With a focus on speed and efficiency, road tires are designed to deliver a smooth and fast ride, making them perfect for road racing, commuting, and recreational cycling on well-maintained roads.

Mountain Bike Tires for Off-Road Adventures

When venturing off-road onto rough and unpredictable terrains, mountain bike tires are a necessity. These tires are characterized by deep, aggressive tread patterns that provide superior traction and control on dirt, gravel, rocks, and roots. Mountain bike tires come in various widths and tread designs to suit different types of off-road conditions, such as cross-country trails, downhill descents, and technical terrains. By choosing the right mountain bike tires, you can conquer challenging trails with confidence and precision.

Gravel Tires for Mixed Surfaces

For cyclists seeking versatility to tackle a mix of terrains, gravel bike tires are the perfect choice. Gravel tires feature a moderate tread pattern that strikes a balance between efficiency on pavement and traction on gravel, dirt, and rough roads. These tires offer a comfortable ride with enhanced puncture protection, making them ideal for gravel grinding, bikepacking, and exploring diverse terrain types. With gravel tires, you can seamlessly transition between different surfaces without compromising on performance.

Summary

Selecting terrain-specific bike tires tailored to your riding preferences and the surfaces you encounter is essential for optimizing your cycling experience. Whether you ride on smooth roads, rugged mountain trails, or mixed surfaces, choosing the right tires can significantly impact your performance, comfort, and enjoyment on the bike. By understanding the specific characteristics of road, mountain, and gravel tires, you can make informed choices that cater to your riding needs and elevate your cycling adventures to new heights. Make effortless choices by investing in terrain-specific bike tires that boost your performance and ensure a seamless ride every time.

Bike Budget Tips: Must-Have Strategies for First-Time Riders

In the world of biking, setting a clear budget goal is key to a successful and stress-free start. By knowing how much youre willing to invest in your cycling journey, you can ride off into the sunset without breaking the bank. These bike budget tips will guide you towards a cost-effective and unforgettable biking experience.

Cycling is an exhilarating and eco-friendly way to commute, exercise, or simply enjoy the great outdoors. However, for first-time riders, getting into the world of biking can be overwhelming, especially when considering the costs involved. In this article, we will explore some essential budget tips for first-time riders to help them get started on their biking journey without breaking the bank.

Setting Your Budget Goals

Before diving into the world of cycling, it’s crucial to establish your budget goals. Determine how much you are willing to spend on your new biking adventure. This includes not only the cost of purchasing a bike but also additional expenses such as accessories, gear, maintenance, and possibly bike repairs down the road. By setting a clear budget from the start, you can avoid overspending and ensure a more enjoyable biking experience without financial worries.

Choosing the Right Bike

One of the most significant expenses for first-time riders is purchasing a bike. When selecting a bike, it’s essential to find a balance between quality and affordability. Consider your riding needs and preferences to choose the right type of bike, whether it’s a road bike, mountain bike, hybrid bike, or commuter bike. Research different brands and models within your budget range to find the best value for your money. Additionally, exploring second-hand or refurbished bikes can be a cost-effective option for budget-conscious riders.

Investing in Essential Gear

While purchasing a bike is a significant expense, investing in essential biking gear is equally important for comfort, safety, and performance. Helmets, cycling gloves, padded shorts, water bottles, and bike lights are some of the necessary gear items that every cyclist should have. Look for sales, discounts, or bundle deals to save money on gear purchases. Quality gear will not only enhance your riding experience but also ensure your safety on the road.

Do-It-Yourself Maintenance

Regular maintenance is key to keeping your bike in top condition and extending its lifespan. Learning basic bike maintenance skills can save you money on costly repairs and tune-ups. Simple tasks such as cleaning and lubricating your bike chain, adjusting brakes, and checking tire pressure can be easily done at home with the right tools and resources. Online tutorials, bike maintenance books, and local workshops can help you gain the necessary knowledge and confidence to maintain your bike on a budget.

Joining Cycling Communities

Being part of cycling communities and groups can be beneficial for first-time riders in many ways. These communities often offer group rides, workshops, and events that provide opportunities to learn from experienced cyclists, discover new biking routes, and exchange tips on budget-friendly biking strategies. Moreover, cycling communities may have bike swap meets or rental programs where you can buy or rent quality used bikes and gear at a lower cost than retail prices.

Conclusion

Embarking on your biking journey as a first-time rider can be both exciting and cost-effective with the right budget strategies in place. By setting clear budget goals, choosing the right bike, investing in essential gear, learning basic maintenance skills, and joining cycling communities, you can enjoy the benefits of cycling while staying within your budget. Remember, biking is not only a mode of transportation or exercise—it’s a sustainable and rewarding lifestyle choice that can be embraced by riders of all levels and budgets. Happy riding!

Bike Maintenance Made Effortless: Quick Daily Routines

Keep your bike running smoothly with these quick and easy daily routines for **bike maintenance**. Inspect your tires, lubricate your chain, and check your brakes regularly to ensure a safe and enjoyable ride every time.

Cycling is a beloved activity for many individuals who enjoy the outdoors and staying active. Proper bike maintenance is essential to ensure a smooth and safe riding experience. By implementing quick daily routines, you can keep your bike in top condition and avoid potential issues down the road. This article will guide you through easy-to-follow maintenance practices that will help you prolong the life of your bike and enhance your overall cycling experience.

Inspect Your Tires Regularly

One of the most crucial aspects of bike maintenance is checking your tires regularly. Proper tire pressure not only ensures a comfortable ride but also reduces the risk of flats and damage. Use a pressure gauge to check the tire pressure and inflate them to the recommended levels as specified on the tire sidewall. Inspect the tires for any cuts, bulges, or excessive wear and replace them if necessary. Keeping your tires in good condition will improve your bike’s performance and safety on the road.

Lubricate Your Chain

A well-lubricated chain is essential for smooth gear shifting and efficient pedaling. Make it a habit to lubricate your chain regularly, especially after riding in wet or muddy conditions. Use a bike-specific lubricant and apply a small amount to each link of the chain. Rotate the pedals to allow the lubricant to penetrate the chain thoroughly. Wipe off any excess lubricant to prevent attracting dirt and grime. A properly lubricated chain will extend its lifespan and improve your overall riding experience.

Check Your Brakes

Brakes are a critical safety component of your bike, and regular inspection is necessary to ensure they function properly. Check your brake pads for wear and replace them if they are worn down. Adjust the brake levers and cables to ensure they engage smoothly and provide sufficient stopping power. Test your brakes before every ride to ensure they respond effectively. Properly maintained brakes are essential for your safety on the road, so don’t overlook this important aspect of bike maintenance.

Clean Your Bike

Keeping your bike clean not only improves its appearance but also helps prevent premature wear and damage. After each ride, wipe down your bike frame, fork, and wheels with a damp cloth to remove dirt, dust, and grime. Use a mild detergent or bike-specific cleaner to deep clean your bike periodically. Pay special attention to hard-to-reach areas like the chainrings, cassette, and derailleurs. Regular cleaning not only prolongs the lifespan of your bike but also makes maintenance tasks easier and more effective.

Inspect for Loose Bolts and Components

Before every ride, take a few minutes to inspect your bike for any loose bolts or components. Check the saddle, handlebars, stem, pedals, and other parts for any signs of looseness. Tighten any bolts that are loose using the appropriate tools. Pay attention to the headset and wheel quick releases to ensure they are properly secured. Regularly checking for loose components will prevent potential safety hazards and ensure a smooth and worry-free ride.

In conclusion, incorporating quick daily maintenance routines into your cycling regimen is essential for the longevity and performance of your bike. By following these simple tips, you can keep your bike in excellent condition and enjoy a hassle-free riding experience. Remember that a well-maintained bike not only enhances your enjoyment of cycling but also ensures your safety on the road. Take care of your bike, and it will take care of you.

Essential Bike Tune-Up Tips for Peak Performance

Is your bike ready to hit the road? Discover essential bike maintenance tips to keep your wheels spinning smoothly and safely. From pre-ride inspections to adjusting gears and brakes, these simple tune-up tips will have you cruising with confidence. Time to pedal towards peak performance!

Cycling enthusiasts, whether beginners or seasoned riders, understand the importance of regular bike maintenance for optimal performance and longevity. A well-maintained bicycle not only ensures a smoother and more efficient ride but also enhances safety on the road. In this article, we will explore essential bike tune-up tips for peak performance, helping you keep your two-wheeled companion in top condition.

Importance of Regular Bike Tune-Ups

Regular bike tune-ups are crucial to maintaining the health and performance of your bicycle. Just like any other machine, bicycles require care and attention to function at their best. By performing routine maintenance, you can prevent potential issues before they escalate, prolong the lifespan of your bike, and enjoy a safer and more enjoyable cycling experience.

Pre-Ride Inspection

Before each ride, it’s essential to conduct a brief pre-ride inspection to ensure that your bike is in good working order. Check the tire pressure, brakes, and overall condition of the bike. Make sure that the tires are adequately inflated, the brake pads are not worn out, and all components are securely fastened. This quick check can help you identify any potential issues before hitting the road.

Cleaning and Lubrication

Regular cleaning and lubrication are key components of bike maintenance. After a ride, make it a habit to clean your bike to remove dirt, grime, and debris that can cause wear and tear on the components. Pay special attention to the chain, derailleurs, and cassette. Once clean, apply a suitable lubricant to ensure smooth and efficient operation of the drivetrain.

Adjusting Gears and Brakes

Properly adjusted gears and brakes are essential for a safe and enjoyable ride. If you notice any issues such as shifting problems or squeaky brakes, it’s time to make adjustments. Check the cable tension, limit screws, and alignment to ensure that your gears and brakes function correctly. If you’re unsure how to adjust them, consider seeking help from a professional bike mechanic.

Wheel Truing

Wheels that are out of true can lead to a bumpy and unstable ride. Periodically check the true of your wheels by spinning them and looking for any wobbles or hops. Use a spoke wrench to adjust the tension of the spokes and bring the wheel back into true. Properly trued wheels not only improve the ride quality but also prolong the life of the wheelset.

Checking and Replacing Components

Over time, bike components such as brake pads, cables, and chains wear out and need replacement. Regularly inspect these components for signs of wear and tear and replace them as needed. Investing in quality components and replacing them in a timely manner can prevent costly repairs down the road and ensure peak performance of your bike.

Professional Tune-Ups

While basic maintenance can be done at home, it’s also advisable to schedule regular professional tune-ups for your bike. A professional bike mechanic can perform a more thorough inspection, identify any underlying issues, and fine-tune your bike for optimal performance. Additionally, they can provide valuable advice on how to maintain your bike between tune-ups.

In conclusion, regular bike tune-ups are essential for maintaining the performance, safety, and longevity of your bicycle. By following these essential tune-up tips, you can keep your bike in peak condition and enjoy many more miles of smooth and enjoyable cycling. Remember, a well-maintained bike is a happy bike!

Beginner-Friendly Bike Repair Hacks | Effortless Tips for Budget-conscious Cyclists

Whether youre a casual rider or a seasoned cyclist, these beginner-friendly bike maintenance tips will make keeping your bike in top shape a breeze. From essential tools to proper tire maintenance and learning basic brake adjustments, these effortless hacks are perfect for budget-conscious cyclists looking to enjoy a smoother ride. So, grab your bike multi-tool and get ready to roll with confidence!

Cycling is a fantastic way to stay active, explore the outdoors, and promote a healthy lifestyle. However, maintaining your bike can sometimes feel daunting, especially if you’re on a budget. Fortunately, there are several beginner-friendly bike repair hacks that can help you keep your bike in top shape without breaking the bank. Whether you’re a casual rider or a seasoned cyclist, these effortless tips will make maintenance more manageable and enjoyable.

1. Essential Tools Every Cyclist Needs
Before diving into bike repair, it’s crucial to have the right tools. While professional bike repair kits can be expensive, you can start with some basic essentials that won’t cost a fortune. Invest in a quality bike multi-tool, tire levers, a pump, and chain lubricant. These tools will come in handy for most basic repairs and maintenance tasks.

2. Keep Your Bike Clean
Regular cleaning is essential for bike maintenance. Use a gentle bike-specific cleaner or mild soap and water to clean the frame, wheels, and drivetrain. A clean bike not only looks better but also performs better. Remember to avoid using high-pressure water, as it can damage sensitive components.

3. Check and Inflate Your Tires
Proper tire maintenance is key to a smooth and safe ride. Check your tire pressure regularly using a gauge and ensure they are inflated to the recommended PSI (pounds per square inch) as indicated on the sidewall of the tire. Underinflated tires can lead to increased rolling resistance and more frequent punctures.

4. Learn Basic Brake Adjustments
Brakes are a crucial safety feature on your bike, so it’s essential to keep them in good working condition. Learn how to adjust your brake pads so that they are aligned properly with the rim. Additionally, check the brake cables for signs of wear and replace them if necessary. Properly functioning brakes can prevent accidents and ensure a safe ride.

5. Master the Art of Chain Maintenance
A well-lubricated chain is essential for smooth shifting and efficient pedaling. Keep your chain clean by regularly wiping off dirt and grime with a rag. Apply a bicycle-specific chain lubricant and wipe off any excess to prevent attracting more dirt. A well-maintained chain will extend the life of your drivetrain components and improve overall performance.

6. Tighten Loose Bolts
Regularly check all the bolts on your bike, including those on the stem, handlebars, seat post, and pedals. Loose bolts can lead to unwanted creaking noises and compromise the structural integrity of your bike. Use a torque wrench to ensure that bolts are tightened to the manufacturer’s specifications.

7. Learn How to Fix a Flat Tire
Flat tires are a common occurrence for cyclists, but they don’t have to ruin your ride. Learn how to fix a flat tire by carrying a spare tube, tire levers, and a pump with you on every ride. Practice changing a tube at home so you’ll be prepared when you encounter a flat on the road.

By following these beginner-friendly bike repair hacks, you can save money on professional repairs and keep your bike in excellent condition. Remember that regular maintenance is the key to a long-lasting and enjoyable riding experience. With a little bit of effort and know-how, you can become a self-sufficient cyclist and tackle basic repairs with confidence. Happy riding!

Cracked Bike Pedals Repair: Must-Have Step-by-Step Guide

Are you tired of dealing with cracked bike pedals interrupting your cycling adventures? Say goodbye to the frustration! Our must-have step-by-step guide on repairing cracked bike pedals will have you back on the road in no time. Master the art of fixing those cracks, and get ready for a smoother ride ahead!

Cycling enthusiasts know the frustration of dealing with cracked bike pedals. However, instead of letting this issue derail your ride, learning how to repair cracked bike pedals can save you time and money. This must-have step-by-step guide will walk you through the process of repairing cracked bike pedals, ensuring you get back on the road quickly and safely.

Identifying the Issue

Before you can start repairing your cracked bike pedals, you need to identify the extent of the damage. Cracks in bike pedals can occur due to excessive wear and tear, impacts, or even manufacturing defects. Begin by closely inspecting the pedal for any visible cracks or damage. Use a flashlight to check for hairline cracks that may not be immediately noticeable.

Tools and Materials Needed

To repair cracked bike pedals, you will need a few essential tools and materials. These include:

– Allen key or wrench
– Epoxy adhesive
– Sandpaper
– Clean rag
– Protective gloves
– Safety goggles

Ensure you have all these items on hand before you start the repair process.

Step-by-Step Repair Guide

Step 1: Remove the Pedal

Start by removing the pedal from the bike using the appropriate tool. Most bike pedals can be easily unscrewed using an Allen key or wrench. Once the pedal is detached, clean it thoroughly with a clean rag to remove any dirt or debris.

Step 2: Sand the Cracked Area

Use sandpaper to gently sand the cracked area of the pedal. This step helps create a rough surface for better adhesion of the epoxy adhesive later on. Be careful not to sand too aggressively, as you don’t want to further damage the pedal.

Step 3: Apply Epoxy Adhesive

Next, apply a generous amount of epoxy adhesive to the cracked area of the pedal. Make sure to spread the adhesive evenly and cover the entire crack. Epoxy adhesive is known for its strength and durability, making it ideal for repairing bike pedals.

Step 4: Clamp and Let Dry

Once you have applied the epoxy adhesive, gently clamp the cracked area together to ensure a tight bond. Allow the adhesive to dry completely as per the manufacturer’s instructions. This usually takes a few hours, so be patient and avoid using the pedal until the adhesive has fully cured.

Step 5: Reattach the Pedal

After the epoxy adhesive has dried and cured, reattach the pedal to your bike using the Allen key or wrench. Make sure it is securely fastened to avoid any issues while riding.

Final Checks and Maintenance

Before hitting the road, give your repaired bike pedal a final inspection to ensure the repair holds up. Test the pedal by applying some pressure to check for any signs of weakness. Additionally, consider applying a protective coating to the pedal to prevent future damage and extend its lifespan.

In conclusion, understanding how to repair cracked bike pedals is a valuable skill for any cyclist. By following this step-by-step guide and being prepared with the right tools and materials, you can quickly and effectively fix cracked pedals, allowing you to enjoy your rides without interruption. Take care of your bike pedals, and they will take care of you on your cycling adventures.

Visibility and Safety Guaranteed: Effortless Bike Lights Repair

Is your bike light flickering or completely out? Dont let a malfunctioning bike light dim your ride – keep your visibility and safety in check with these easy bike lights repair tips. Whether its dead batteries, loose connections, or damaged wiring, weve got you covered on getting your lights shining bright again in no time! Cycling just got safer and more enjoyable with effortless bike lights repair.

Cycling enthusiasts know the importance of visibility and safety when riding their bikes, especially during low-light conditions. One crucial element in ensuring visibility on the road is having properly functioning bike lights. These lights not only illuminate the cyclist’s path but also make them more visible to other road users, reducing the risk of accidents. However, bike lights can sometimes malfunction or require repair, which can be a hassle for riders. In this article, we will provide you with some tips and tricks for effortless bike lights repair, ensuring that your rides are both safe and enjoyable.

Understanding the Components of Bike Lights

Before attempting any repairs on your bike lights, it’s essential to understand the different components that make up the lighting system. Bike lights typically consist of a front light, rear light, and sometimes additional side lights for enhanced visibility. The front light is usually white and is mounted on the handlebars, while the rear light is red and is mounted on the seat post or rear rack. Familiarize yourself with how these components are connected and powered to facilitate the repair process.

Troubleshooting Common Issues

When your bike lights aren’t working correctly, the first step is to troubleshoot the problem. Common issues that cyclists face with their bike lights include dead batteries, loose connections, or damaged wiring. Start by checking the batteries in your lights and replacing them if necessary. Make sure all connections are secure and free of debris, as dirt or corrosion can affect performance. If you notice any visible damage to the wiring or casing of the lights, it may be time for some repairs.

DIY Repairs for Bike Lights

For minor issues such as loose connections or broken mounts, you can often perform DIY repairs at home with just a few basic tools. Use a screwdriver to tighten any loose screws or connections and ensure that the lights are securely attached to your bike. If you need to replace a bulb in your bike light, make sure to use the correct type and wattage to avoid damaging the light further. Additionally, you can use electrical tape to secure any exposed wires and prevent them from short-circuiting.

Seeking Professional Help

If you encounter more complex issues with your bike lights that you cannot resolve on your own, it may be time to seek professional help. Local bike shops or repair centers often offer services for fixing bike lights and can diagnose and repair the problem efficiently. Professional technicians have the expertise and tools necessary to handle intricate repairs and ensure that your bike lights are in optimal working condition.

Regular Maintenance for Long-Term Performance

To prevent frequent breakdowns and ensure the long-term performance of your bike lights, regular maintenance is essential. Clean your lights periodically to remove dirt and grime that can obstruct the brightness of the bulbs. Check the batteries regularly and replace them as needed to avoid sudden failures during your rides. Additionally, inspect the wiring and connections for any signs of wear or damage, addressing problems promptly to prevent further issues.

In conclusion, having functioning bike lights is crucial for your safety and visibility on the road, especially during dawn, dusk, or nighttime rides. By understanding the components of your bike lights, troubleshooting common issues, performing DIY repairs when possible, seeking professional help when needed, and maintaining your lights regularly, you can ensure that your bike lights are always in top condition. Remember, a well-lit bike is a safe bike, so don’t overlook the importance of proper bike lights repair for a smooth and secure cycling experience.

Bent Bike Wheel Repair: Effortless DIY Solutions

Is a bent bike wheel throwing a wrench in your cycling plans? Learn how to effortlessly fix this common issue with our simple DIY solutions. From minor adjustments with a spoke wrench to utilizing the braking pads, weve got you covered to get your wheels back in shape and back on the road in no time!

Cycling is an enjoyable and healthy activity loved by many, but encountering a bent bike wheel can quickly put a damper on your ride. Whether it’s a slight wobble or a more severe bend, addressing this issue promptly is crucial for a smooth and safe cycling experience. While professional help is always an option, there are also simple do-it-yourself solutions to repair a bent bike wheel effortlessly. In this guide, we will explore some DIY methods to straighten a bent bike wheel and get you back on the road in no time.

Understanding the Problem: Identifying a Bent Bike Wheel

Before attempting to repair a bent bike wheel, it’s essential to identify the issue accurately. Signs of a bent wheel include noticeable wobbling while riding, brake pads rubbing against the rim, or an unusual sound coming from the wheel when spinning. Taking the time to pinpoint the problem areas will help determine the best approach for repair.

DIY Solutions for Bent Bike Wheel Repair

Minor Adjustments with a Spoke Wrench

For minor wheel bends, a spoke wrench can be a handy tool for adjusting the tension of individual spokes. Begin by locating the bent section of the wheel and identifying the affected spokes. Use the spoke wrench to tighten or loosen the spokes incrementally, working your way around the wheel to balance the tension. Make small adjustments and regularly check the wheel’s trueness by spinning it to gauge progress.

Utilizing the Braking Pads

In cases where the bend is minimal and primarily affecting one portion of the wheel, utilizing the brake pads can offer a quick fix. Squeeze the brake lever to hold the affected area against the brake pads while spinning the wheel. The friction created against the pads can help straighten out minor bends over time. Remember to release the brake lever periodically to assess the wheel’s progress and prevent overheating.

DIY Truing Stand

Creating a makeshift truing stand can aid in effectively straightening a bent bike wheel. Secure your bike upside down or on a stable stand to allow the wheel to spin freely. Use zip ties or cable ties as makeshift gauges by attaching them to the frame, close to the wheel rim. Observe the distance between the zip ties and the rim as you spin the wheel, adjusting spoke tension accordingly to minimize wobbles and bends.

Safety Precautions and Final Checks

Before embarking on any DIY repairs, ensure your safety by wearing protective gear such as gloves and eye protection. It’s also beneficial to work in a well-lit and spacious area to carry out the repairs efficiently. Once you have straightened the bent bike wheel using the DIY methods outlined, perform a final check by spinning the wheel and observing for any remaining wobbles or irregularities.

Conclusion

Repairing a bent bike wheel doesn’t have to be a daunting task, thanks to these effortless DIY solutions. By understanding the problem, utilizing simple tools like a spoke wrench or brake pads, and incorporating a makeshift truing stand, you can straighten out minor bends and get back to enjoying your cycling adventures. Remember to prioritize safety, take your time with adjustments, and test the wheel thoroughly before hitting the road. With a bit of patience and the right approach, tackling a bent bike wheel can be a satisfying and rewarding endeavor for any cycling enthusiast.