Alignment and Truing Tips for Bike Wheels: Effortless Maintenance

Discover the secret to effortless bike wheels maintenance with our expert tips for perfect alignment and truing. Say goodbye to wobbling and uneven wear – keep your ride smooth and safe with these practical maintenance tips.

Title: Expert Tips for Perfect Alignment and Truing of Bike Wheels

Ensuring that your bike wheels are properly aligned and trued is crucial for a smooth and safe riding experience. Misaligned or untrue wheels can lead to wobbling, reduced stability, and increased wear and tear on your bike components. By following some basic maintenance tips, you can easily keep your bike wheels in optimal condition. In this article, we will discuss the importance of wheel alignment and truing, as well as provide you with practical tips to maintain your bike wheels effortlessly.

Understanding Wheel Alignment and Truing

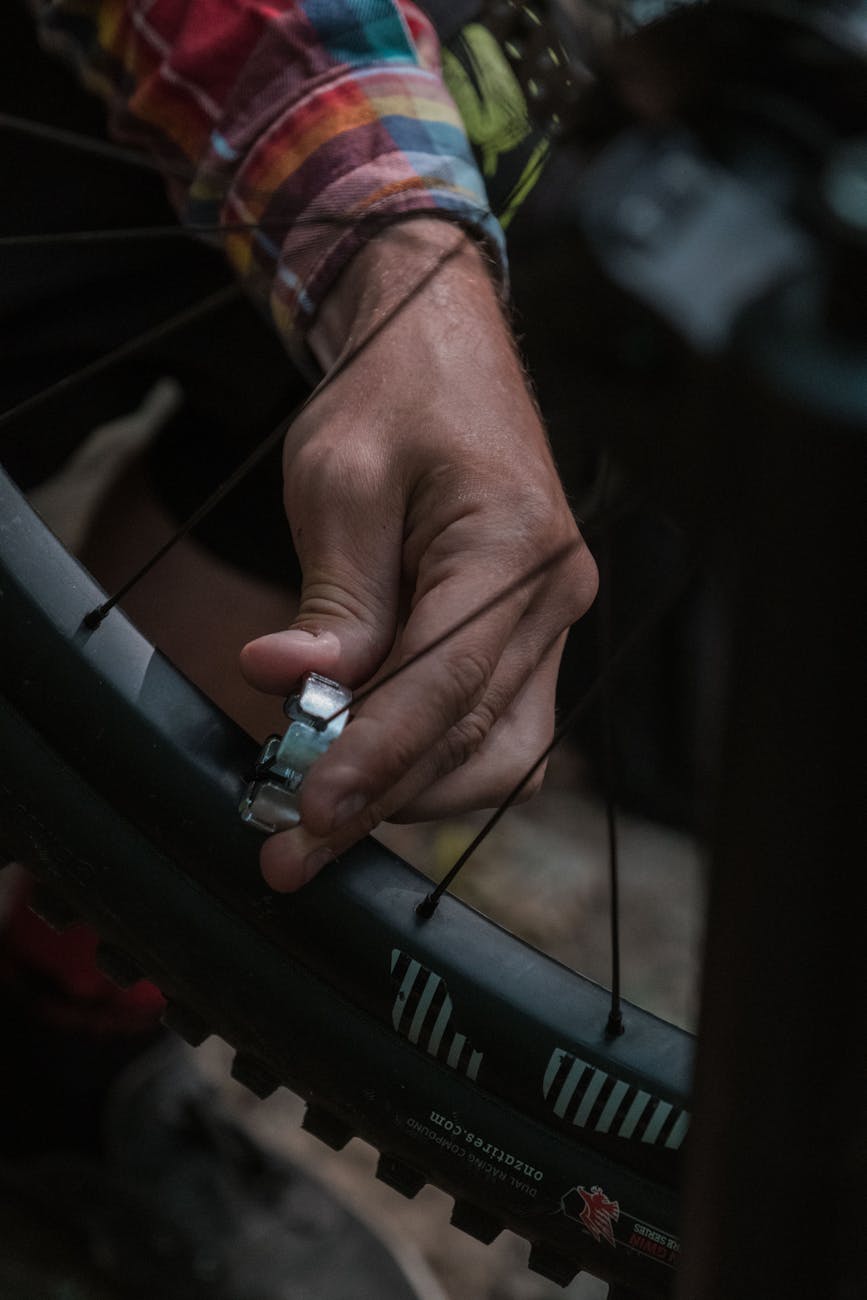
Proper alignment and truing are essential for the performance and longevity of your bike wheels. Wheel alignment refers to the positioning of the wheel in relation to the frame and fork of the bike. When a wheel is misaligned, it can cause handling issues and uneven tire wear. Truing, on the other hand, involves adjusting the tension of the spokes to eliminate any lateral or radial deviations in the wheel, ensuring it spins straight and true. Regularly checking and correcting the alignment and truing of your bike wheels will not only enhance your ride quality but also prevent potential accidents due to wheel problems.

Signs of Misalignment and Untrue Wheels

Before delving into the maintenance tips, it’s essential to know the signs that indicate your bike wheels may be misaligned or untrue. Common signs include wobbling or vibration while riding, rubbing of the tires against the frame or brakes, and uneven gaps between the wheel rim and brake pads. If you notice any of these signs, it’s time to check and adjust your wheel alignment and truing.

Maintenance Tips for Effortless Alignment and Truing

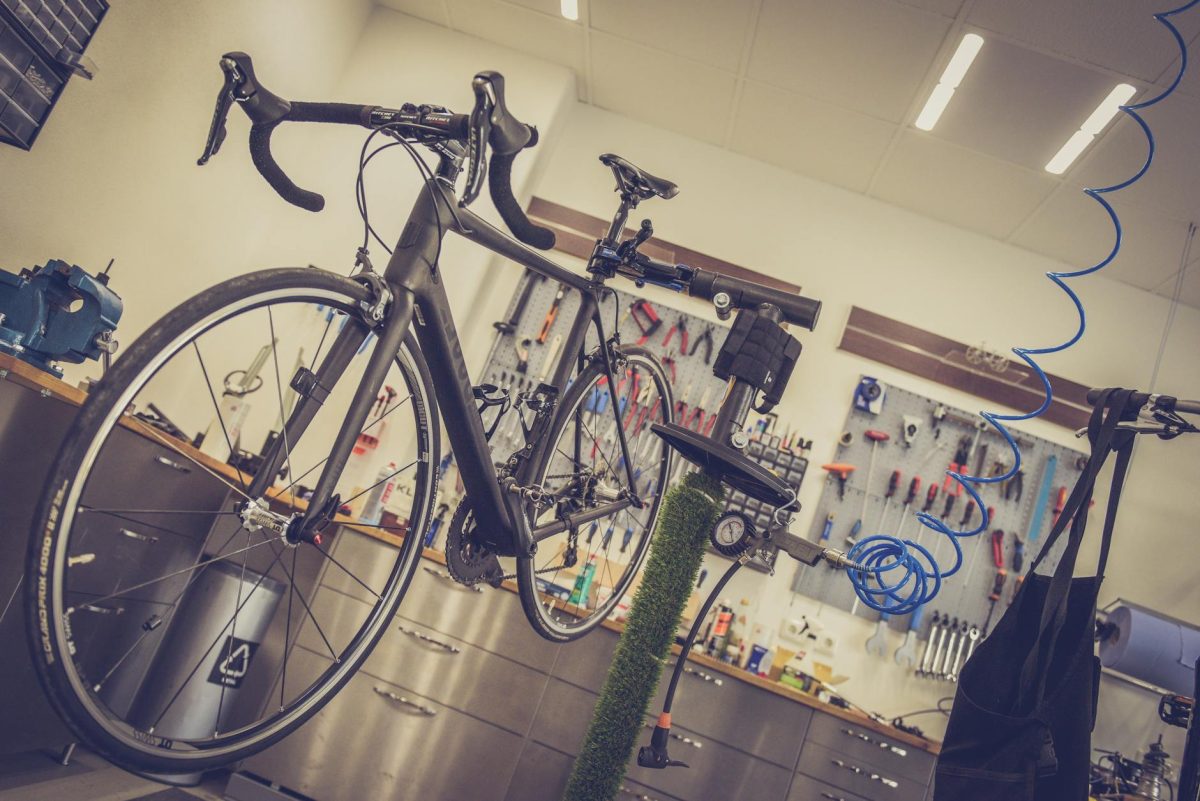
1. Use a Truing Stand: Investing in a truing stand can make the process of aligning and truing your bike wheels much easier and more accurate. Truing stands provide a stable platform to spin the wheel and gauge the extent of misalignment or untrueness.

2. Check Spoke Tension: Inspect the tension of the spokes regularly by gently squeezing them together in pairs. Properly tensioned spokes will have a consistent feel, while loose or overly tight spokes indicate the need for adjustment.

3. Adjust Spokes Gradually: When truing a wheel, make small, gradual adjustments to the spokes rather than large turns. This will help you fine-tune the wheel’s alignment without risking overcorrection.

4. Use a Spoke Wrench: A spoke wrench is a handy tool for adjusting the tension of individual spokes. Make sure to use the correct size of spoke wrench for your bike’s spokes to prevent damaging them.

5. Check for Radial and Lateral Deviations: When truing a wheel, pay attention to both radial (up-and-down) and lateral (side-to-side) deviations. Addressing both types of misalignment will ensure a smooth and stable ride.

Conclusion

Proper alignment and truing of your bike wheels are essential maintenance tasks that can significantly impact your riding experience. By following the tips outlined in this article, you can easily maintain your bike wheels in optimal condition without the need for professional help. Regular checks and adjustments will not only extend the lifespan of your wheels but also enhance the safety and performance of your bike. Effortless maintenance routines can go a long way in ensuring that you enjoy a smooth and enjoyable ride every time you hit the road.
Beginner-Friendly Bike Repair Hacks | Effortless Tips for Budget-conscious Cyclists

Whether youre a casual rider or a seasoned cyclist, these beginner-friendly bike maintenance tips will make keeping your bike in top shape a breeze. From essential tools to proper tire maintenance and learning basic brake adjustments, these effortless hacks are perfect for budget-conscious cyclists looking to enjoy a smoother ride. So, grab your bike multi-tool and get ready to roll with confidence!

Cycling is a fantastic way to stay active, explore the outdoors, and promote a healthy lifestyle. However, maintaining your bike can sometimes feel daunting, especially if you’re on a budget. Fortunately, there are several beginner-friendly bike repair hacks that can help you keep your bike in top shape without breaking the bank. Whether you’re a casual rider or a seasoned cyclist, these effortless tips will make maintenance more manageable and enjoyable.

1. Essential Tools Every Cyclist Needs
Before diving into bike repair, it’s crucial to have the right tools. While professional bike repair kits can be expensive, you can start with some basic essentials that won’t cost a fortune. Invest in a quality bike multi-tool, tire levers, a pump, and chain lubricant. These tools will come in handy for most basic repairs and maintenance tasks.

2. Keep Your Bike Clean
Regular cleaning is essential for bike maintenance. Use a gentle bike-specific cleaner or mild soap and water to clean the frame, wheels, and drivetrain. A clean bike not only looks better but also performs better. Remember to avoid using high-pressure water, as it can damage sensitive components.

3. Check and Inflate Your Tires
Proper tire maintenance is key to a smooth and safe ride. Check your tire pressure regularly using a gauge and ensure they are inflated to the recommended PSI (pounds per square inch) as indicated on the sidewall of the tire. Underinflated tires can lead to increased rolling resistance and more frequent punctures.

4. Learn Basic Brake Adjustments
Brakes are a crucial safety feature on your bike, so it’s essential to keep them in good working condition. Learn how to adjust your brake pads so that they are aligned properly with the rim. Additionally, check the brake cables for signs of wear and replace them if necessary. Properly functioning brakes can prevent accidents and ensure a safe ride.

5. Master the Art of Chain Maintenance
A well-lubricated chain is essential for smooth shifting and efficient pedaling. Keep your chain clean by regularly wiping off dirt and grime with a rag. Apply a bicycle-specific chain lubricant and wipe off any excess to prevent attracting more dirt. A well-maintained chain will extend the life of your drivetrain components and improve overall performance.

6. Tighten Loose Bolts
Regularly check all the bolts on your bike, including those on the stem, handlebars, seat post, and pedals. Loose bolts can lead to unwanted creaking noises and compromise the structural integrity of your bike. Use a torque wrench to ensure that bolts are tightened to the manufacturer’s specifications.

7. Learn How to Fix a Flat Tire
Flat tires are a common occurrence for cyclists, but they don’t have to ruin your ride. Learn how to fix a flat tire by carrying a spare tube, tire levers, and a pump with you on every ride. Practice changing a tube at home so you’ll be prepared when you encounter a flat on the road.

By following these beginner-friendly bike repair hacks, you can save money on professional repairs and keep your bike in excellent condition. Remember that regular maintenance is the key to a long-lasting and enjoyable riding experience. With a little bit of effort and know-how, you can become a self-sufficient cyclist and tackle basic repairs with confidence. Happy riding!

Fix Noisy Bike Bottom Bracket with Effortless Solution

Is your bikes bottom bracket causing ruckus on your ride? Say goodbye to those annoying creaks and clunks with our effortless solution to fix a noisy bike bottom bracket. Enjoy a smooth, quiet cycling experience once again!

Subheading (H2): Understanding the Issue of a Noisy Bike Bottom Bracket

Subheading (H2): Effortless Solutions to Fix a Noisy Bike Bottom Bracket

Subheading (H3): Regular Maintenance Tips to Prevent Noisy Bike Bottom Bracket

Cycling enthusiasts know the frustration that comes with a noisy bike bottom bracket. Whether you’re a casual rider or a dedicated cyclist, dealing with a clunky, creaking bike can put a damper on your riding experience. The bottom bracket is a crucial component of your bike that connects the crankset to the frame, allowing for smooth pedaling motion. When this part starts making noise, it can be a sign of wear and tear or lack of proper maintenance. In this article, we will explore the common causes of a noisy bike bottom bracket and provide you with effortless solutions to fix the issue.

Understanding the Issue of a Noisy Bike Bottom Bracket

A noisy bike bottom bracket can be caused by various factors, such as dirt and grime buildup, worn-out bearings, or improper installation. The first step in resolving the issue is to identify the source of the noise. If your bike is making a clicking, creaking, or grinding sound while pedaling, chances are it’s coming from the bottom bracket area. Ignoring the noise can lead to further damage to your bike’s components and affect your riding performance.

Effortless Solutions to Fix a Noisy Bike Bottom Bracket

One of the most straightforward solutions to fix a noisy bike bottom bracket is to clean and lubricate the component. Start by removing the crankset to access the bottom bracket. Wipe away any dirt or debris that may have accumulated around the bottom bracket shell. Inspect the bearings for signs of wear or damage and replace them if necessary. Apply a generous amount of grease to the bearings and reassemble the crankset.

If cleaning and lubricating the bottom bracket does not resolve the noise issue, it may be time to replace the bearings or the entire bottom bracket assembly. Consult your local bike shop or a professional mechanic for assistance in choosing the right replacement parts. Investing in high-quality bearings and components will ensure a smoother and quieter ride.

Regular Maintenance Tips to Prevent Noisy Bike Bottom Bracket

To prevent future occurrences of a noisy bike bottom bracket, it’s essential to incorporate regular maintenance into your biking routine. Here are some tips to help keep your bottom bracket in top condition:

1. Clean your bike regularly to remove dirt and grime buildup.
2. Check the bottom bracket for signs of wear or damage periodically.
3. Replace worn-out bearings as soon as you notice any noise or play.
4. Avoid over-tightening the bottom bracket during installation.
5. Use quality lubricants to keep the bearings running smoothly.

By following these maintenance tips and addressing any noise issues promptly, you can enjoy a quieter and more enjoyable riding experience. Remember that taking care of your bike’s components will not only prolong their lifespan but also enhance your overall cycling performance.

In conclusion, a noisy bike bottom bracket is a common issue that can be easily resolved with the right knowledge and tools. By understanding the causes of the noise, implementing effortless solutions, and practicing regular maintenance, you can keep your bottom bracket in optimal condition and enjoy a smoother, quieter ride. Don’t let a noisy bike bottom bracket hold you back from exploring new cycling adventures—take action today and get back on the road with confidence.

Gear Up: Essential Derailleur Fixes for Effortless Gear Changes

Ready to breeze through gear changes on your bike? Say goodbye to chain skipping and gear slipping with these essential **derailleur fixes**! Keep the ride smooth and the gears shifting seamlessly with simple adjustments for optimum performance.

Essential Derailleur Fixes for Effortless Gear Changes

The bicycle derailleur is a vital component of your bike’s drivetrain system that enables you to effortlessly shift gears, providing a smooth and efficient riding experience. However, like all mechanical parts, derailleurs can sometimes malfunction or fall out of adjustment, leading to issues such as chain skipping, gear slipping, or difficulty shifting gears. In this article, we will explore some essential derailleur fixes that can help you maintain optimal performance and ensure seamless gear changes on your bike.

Understanding How Your Derailleur Works

Before delving into derailleur fixes, it is essential to have a basic understanding of how this crucial component functions. The derailleur is responsible for moving the chain from one sprocket to another on the cassette or chainrings, allowing you to change gears. When you shift gears using the shifter on your handlebar, the derailleur moves laterally to guide the chain onto the desired gear. Proper adjustment and maintenance of the derailleur are essential for precise and smooth gear changes.

Common Derailleur Issues and Fixes

1. Chain Skipping: Chain skipping occurs when the chain jumps over the teeth of the sprockets, resulting in an uneven and unreliable ride. This issue is often caused by a stretched chain or worn-out cassette. To fix chain skipping, inspect the chain for wear and replace it if necessary. Additionally, check the teeth of the cassette for signs of wear and replace it if excessively worn.

2. Indexing Adjustment: Proper gear shifting relies on accurate indexing adjustment, which ensures that the derailleur moves the chain to the correct position on the sprockets. If you experience difficulty shifting gears or hear grinding noises, your indexing may be off. To adjust the indexing, use the barrel adjuster on the derailleur or shifter to fine-tune the alignment of the chain with the sprockets.

3. Cable Tension: The cable tension plays a crucial role in the smooth operation of the derailleur. If the cable is too loose or too tight, it can lead to imprecise shifting and poor performance. To fix cable tension issues, adjust the tension using the barrel adjuster at the derailleur or shifter. Ensure that the cable is securely fastened and free of fraying or kinks.

4. Limit Screws: The high and low limit screws on the derailleur control the range of motion of the derailleur, preventing the chain from shifting off the sprockets. If your chain falls off the cassette or chainrings, adjust the limit screws to limit the movement of the derailleur towards the outer and inner edges of the gears.

Regular Maintenance Tips

In addition to addressing specific derailleur issues, regular maintenance is key to ensuring optimal performance and longevity of your derailleur. Here are some maintenance tips to keep your derailleur in top shape:

– Clean the derailleur regularly to remove dirt, debris, and grease buildup.
– Lubricate the moving parts of the derailleur to reduce friction and ensure smooth operation.
– Check the alignment of the derailleur hanger and realign if it is bent or misaligned.

By following these essential derailleur fixes and maintenance tips, you can enjoy a seamless and hassle-free gear-changing experience on your bike. Remember to inspect your derailleur regularly and address any issues promptly to keep your bike running smoothly.

Fix Broken Bike Spoke: Essential Beginners’ Guide

Discover the satisfaction of solving a common cycling woe with our Fix Broken Bike Spoke: Essential Beginners Guide. Learn how to expertly fix broken spokes and get back on the road in no time. Master this essential skill, whether youre a newbie or a seasoned cyclist.

Cycling is a fantastic way to stay active and enjoy the outdoors, but encountering a broken bike spoke can quickly turn a leisurely ride into a frustrating experience. Whether you’re a seasoned cyclist or just starting out, knowing how to fix a broken bike spoke is an essential skill to have. In this beginners’ guide, we’ll walk you through everything you need to know to get back on the road quickly and safely.

Understanding the Problem: Identifying a Broken Bike Spoke

The first step in fixing a broken bike spoke is identifying the issue. A broken spoke can cause your wheel to wobble, make unusual noises, or rub against the brakes. If you suspect a broken spoke, inspect your wheel carefully to locate the damaged spoke. It’s crucial to address the issue promptly to prevent further damage to your wheel or the surrounding spokes.

Gathering the Necessary Tools: What You’ll Need

Before attempting to fix a broken bike spoke, gather the necessary tools. You’ll need a spoke wrench, a replacement spoke of the correct length, a screwdriver, and a pair of pliers. These tools are essential for removing the broken spoke and installing the new one correctly. Having everything on hand will streamline the repair process and ensure your bike is back in working order in no time.

Step-by-Step Guide to Fixing a Broken Bike Spoke

1. Remove the Broken Spoke: Begin by removing the broken spoke from your wheel using a spoke wrench. Carefully unscrew the spoke nipple and detach the broken spoke from the wheel.

2. Install the New Spoke: Insert the replacement spoke into the hub and thread it through the appropriate holes in the wheel. Use your spoke wrench to tighten the nipple, ensuring the spoke is securely in place.

3. Adjust the Tension: Once the new spoke is installed, check the tension of the surrounding spokes. Use your spoke wrench to adjust the tension as needed, ensuring that the wheel is well-balanced and spins smoothly.

4. True the Wheel: To true the wheel, spin it slowly and observe any wobbles or unevenness. Make small adjustments to the tension of the spokes as necessary to straighten the wheel and eliminate any wobbles.

Tips for Preventing Future Breakages

Preventing future broken spokes is essential for maintaining the longevity of your bike. Here are some tips to help minimize the risk of spoke breakage:

Regular Maintenance: Schedule routine maintenance checks to ensure your spokes are in good condition.
Avoid Overloading: Avoid carrying heavy loads on your bike, as this can put excess stress on the spokes.
Proper Inflation: Keep your tires inflated to the recommended pressure to prevent excessive strain on the wheel.

By following these tips and techniques, you’ll be well-equipped to fix a broken bike spoke and get back on the road with confidence. Remember, practice makes perfect, and don’t hesitate to seek professional help if you encounter any difficulties. Happy cycling!

Repair Squeaky Bike Brakes: Effortless Fix Guide

Is the irritating squeaking of your bike brakes putting a damper on your ride? Discover how to effortlessly silence those squeaky bike brakes with our step-by-step guide. Keeping your brakes in tiptop shape has never been easier!

How to Repair Squeaky Bike Brakes: An Effortless Fix Guide

Are your bike brakes making an annoying squeaking sound whenever you ride? Don’t worry; fixing squeaky bike brakes is a common issue that can be easily resolved with a few simple steps. In this guide, we will walk you through the process of diagnosing and repairing squeaky bike brakes so that you can enjoy a smooth and silent ride every time.

Identifying the Cause of Squeaky Brakes

The first step in repairing squeaky bike brakes is to identify the root cause of the noise. Squeaking brakes can be caused by a variety of factors, including dirty or worn brake pads, misaligned brake calipers, or contaminated braking surfaces. By carefully examining your bike’s brake system, you can determine the specific cause of the squeaking noise and proceed with the appropriate solution.

Cleaning and Inspecting Brake Pads

One common cause of squeaky bike brakes is dirty or contaminated brake pads. To fix this issue, start by removing the wheel from the bike and inspecting the brake pads for dirt, debris, or wear. If the brake pads appear dirty, gently clean them with a soft bristle brush and rubbing alcohol. Ensure that the brake pads are free of any residue that may be causing the squeaking noise.

Adjusting Brake Calipers

Misaligned brake calipers can also contribute to squeaky bike brakes. To realign the brake calipers, loosen the mounting bolts that secure the calipers to the frame or fork. Carefully adjust the position of the calipers so that they align with the braking surface of the wheel. Once the calipers are properly aligned, tighten the mounting bolts to secure them in place. This simple adjustment can help eliminate the squeaking noise and improve the performance of your bike brakes.

Replacing Worn Brake Pads

If cleaning and adjusting the brake pads do not resolve the squeaking issue, it may be time to replace the brake pads altogether. Over time, brake pads can wear down and lose their effectiveness, leading to squeaking brakes and reduced stopping power. To replace the brake pads, remove the old pads from the calipers and install new ones according to the manufacturer’s instructions. Be sure to choose brake pads that are compatible with your bike’s braking system for optimal performance.

Maintaining Proper Brake Care

Once you have successfully repaired your squeaky bike brakes, it is essential to maintain proper care to prevent future issues. Regularly inspect your brake pads for wear and contamination, clean your braking surfaces, and perform routine maintenance to ensure that your brakes are functioning correctly. By staying proactive with your brake care, you can enjoy a quiet and reliable braking system on your bike.

Conclusion

Repairing squeaky bike brakes is a simple and straightforward process that can improve your riding experience and safety. By identifying the cause of the squeaking noise, cleaning and adjusting brake components, and maintaining proper care, you can eliminate annoying brake squeaks and enjoy smooth, silent braking on your bike. Follow the steps outlined in this guide to address squeaky bike brakes effortlessly and get back to riding with confidence.

Bike Chain Problems: Easy Fixes and Expert Tips

Is your cycling experience being hindered by pesky **bike chain problems**? From chain slippage to rust, weve got you covered with easy fixes and expert tips to keep your chain in top condition for a seamless ride every time.

Cycling enthusiasts know that maintaining a bike’s chain is crucial for smooth and efficient riding. However, even with the best care, bike chain problems can still arise, causing frustration and hindering your cycling experience. In this article, we will delve into common bike chain issues, easy fixes, and expert tips to keep your chain in top condition and ensure a seamless ride every time.

Common Bike Chain Problems

1. Chain Slippage: One of the most common issues cyclists face is chain slippage, where the chain skips over the cogs or chainrings while pedaling. This could be due to a worn chain, improperly adjusted derailleurs, or a dirty chain.

2. Chain Rust: Exposing your bike chain to moisture and humidity can lead to rust formation over time. Rust not only affects the chain’s performance but also shortens its lifespan.

3. Chain Stretch: Continuous use and lack of proper lubrication can cause the chain to stretch. A stretched chain not only affects the shifting performance but can also wear down the cassette and chainrings faster.

Easy Fixes for Bike Chain Problems

Adjusting the Chain Tension

If you notice chain slippage or hear unusual noises while pedaling, it may be time to check your chain tension. A loose chain can lead to various issues, so make sure to adjust the tension to the manufacturer’s recommended specifications.

Cleaning and Lubricating the Chain

Regularly cleaning and lubricating your bike chain is essential for its longevity and performance. Use a degreaser to remove dirt and grime, then apply a high-quality chain lubricant to ensure smooth operation.

Replacing a Worn Chain

If your chain is excessively worn or stretched, it’s time to replace it. A worn chain can cause damage to other components of your bike and compromise your riding experience. Consult your local bike shop for assistance and choose a high-quality chain for optimal performance.

Expert Tips for Maintaining Your Bike Chain

1. Regular Inspections: Make it a habit to inspect your bike chain for wear and tear regularly. Look out for signs of rust, stretching, or misalignment, and address any issues promptly.

2. Proper Lubrication: Use a lubricant specifically designed for bike chains and apply it sparingly. Over-lubrication can attract dirt and debris, leading to faster wear and potential chain problems.

3. Professional Tune-Ups: Schedule regular maintenance checks with a professional bike mechanic to ensure that your chain and other components are in top condition. A professional tune-up can prolong the life of your bike and prevent costly repairs in the long run.

In conclusion, bike chain problems are common among cyclists but can be easily managed with the right knowledge and maintenance routines. By addressing issues promptly, performing regular maintenance, and following expert tips, you can enjoy a smooth and seamless riding experience every time. Remember, a well-maintained chain not only enhances performance but also prolongs the life of your beloved bike.