Fix Loose Handlebars on Your Bike: Effortless Solutions to Get You Riding Smoothly

Is the thought of your bikes loose handlebars giving you a wobbly ride? Dont fret! With a few simple steps outlined in this article, youll be tightening those bolts and cruising smoothly in no time. Lets fix loose handlebars together!

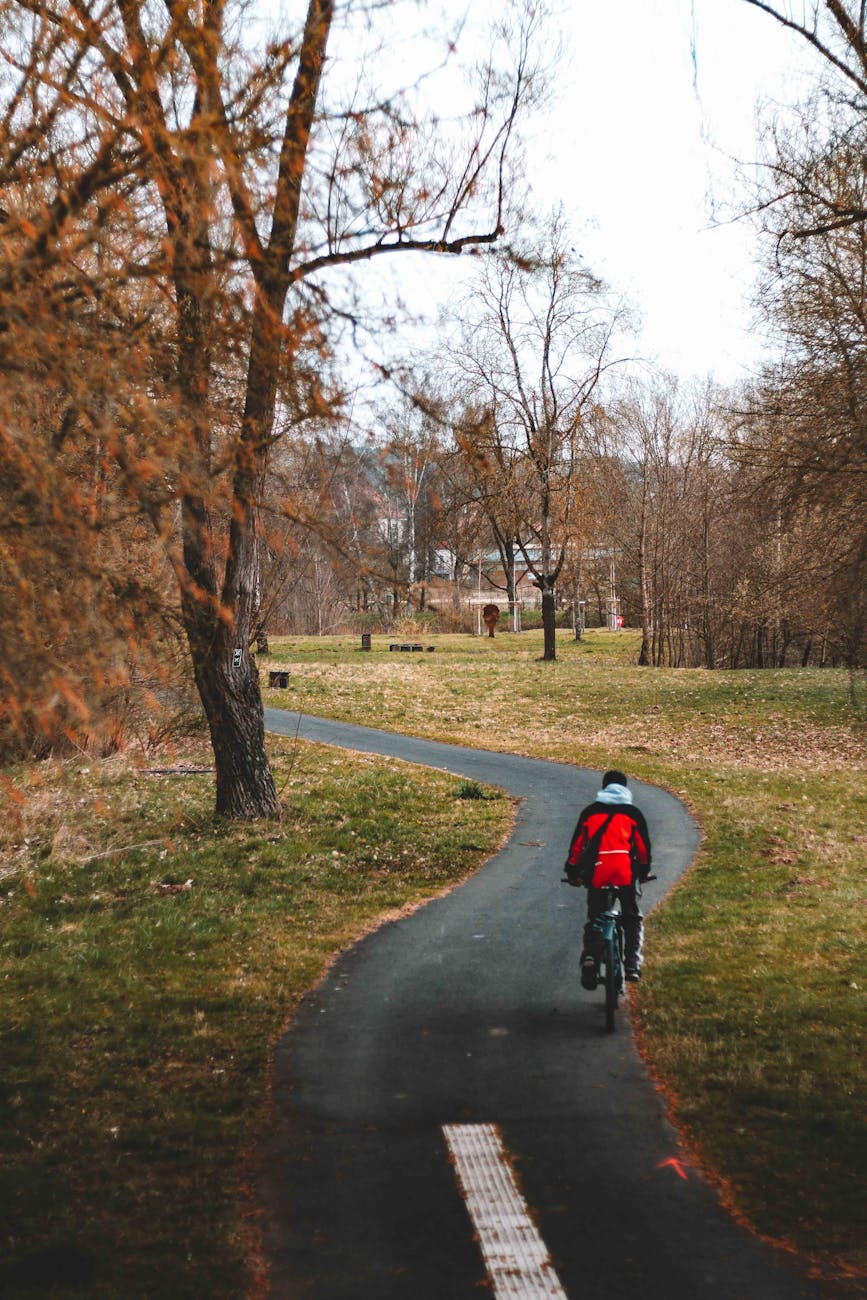
Cycling is a fantastic way to stay fit, explore new places, and enjoy the great outdoors. However, one common issue that cyclists encounter is loose handlebars on their bikes. A wobbly or loose handlebar can not only be annoying but also unsafe. If you’re dealing with this problem, don’t worry! In this article, we will discuss some effortless solutions to fix loose handlebars on your bike and get you back to riding smoothly in no time.

Understanding the Problem

Before you can fix the issue, it’s essential to understand why your handlebars are loose. The most common reason is that the bolts that secure the handlebars to the stem may have come loose due to regular wear and tear or vibrations while riding. Another reason could be that the handlebar clamp is not tightened securely.

Tools You Will Need

To tighten your loose handlebars, you will need a few tools. These include an allen wrench or hex key that fits the bolts on your handlebars and stem. Make sure you have the correct size to avoid damaging the bolts.

Tightening the Bolts

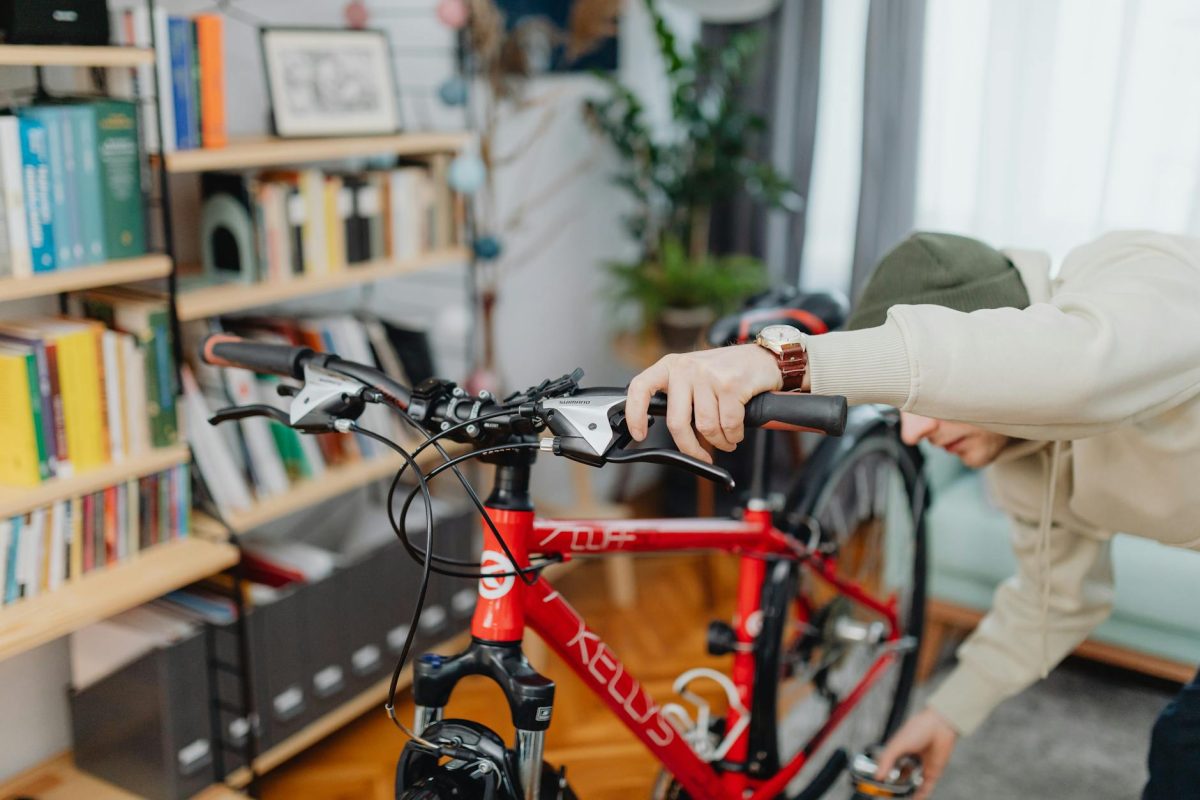
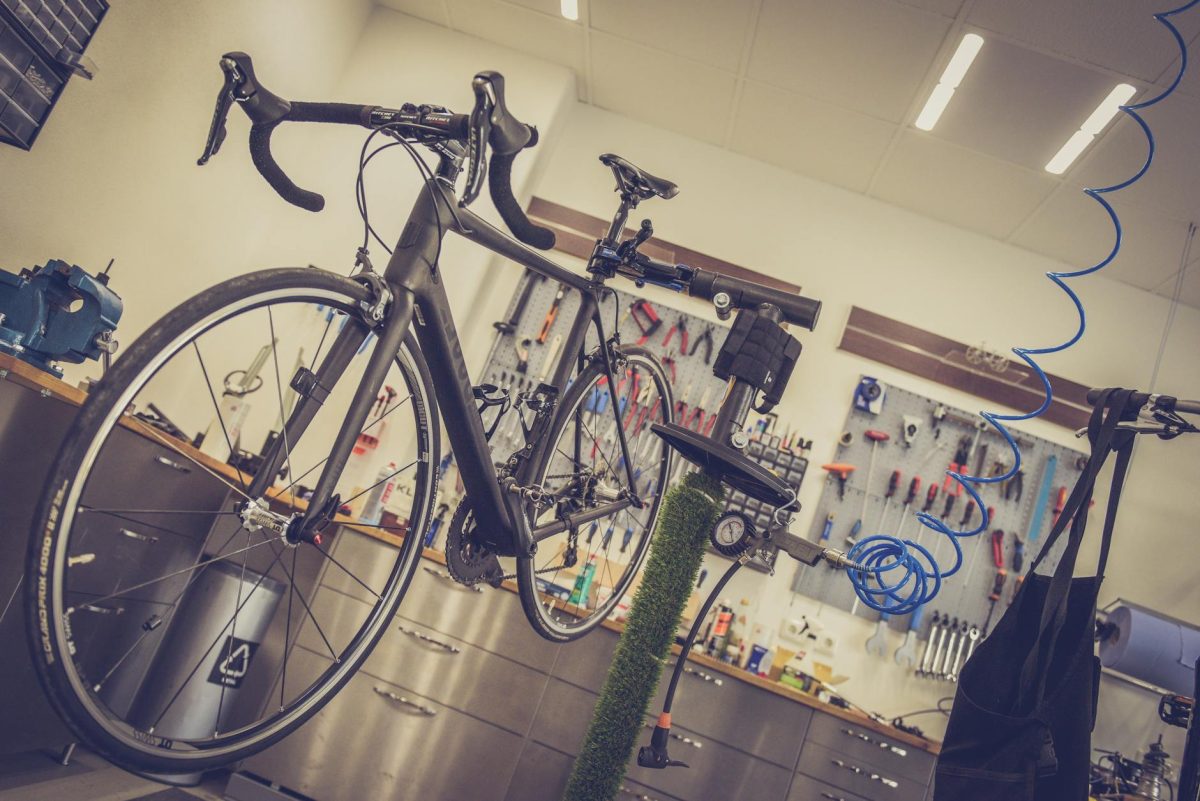
Start by securing your bike in a stable position, either using a bike stand or by flipping it upside down. Use the allen wrench to tighten the bolts on the handlebars and stem. Turn the bolts clockwise to ensure a snug fit. Check all the bolts around the handlebar clamp to make sure they are all tightened properly.

Adjusting the Stem

If tightening the bolts doesn’t solve the issue, you may need to adjust the stem. Loosen the bolts on the side of the stem that clamp onto the fork steerer tube. Align the handlebars so that they are straight and at the desired angle. Make sure they are centered before tightening the bolts back up.

Applying Grip Paste

Sometimes, using grip paste can help create a tighter bond between the handlebars and stem. Apply a small amount of grip paste to the contact points between the handlebars and stem before tightening the bolts. This can add friction and prevent the handlebars from slipping.

Checking for Alignment

Once you have tightened the bolts and adjusted the stem, it’s crucial to check the alignment of your handlebars. Make sure they are positioned symmetrically and at the correct angle for your riding comfort. Test the handlebars by gently turning them from side to side to ensure they are securely in place.

Final Thoughts

Fixing loose handlebars on your bike doesn’t have to be a complicated task. By following these effortless solutions and taking the time to properly tighten and adjust your handlebars, you can enjoy a smooth and safe ride every time. Remember to regularly check and maintain your bike to prevent issues like this from occurring in the future. Now that you’ve fixed your loose handlebars, hop on your bike and hit the road with confidence!

Bent Bike Wheel Repair: Effortless DIY Solutions

Is a bent bike wheel throwing a wrench in your cycling plans? Learn how to effortlessly fix this common issue with our simple DIY solutions. From minor adjustments with a spoke wrench to utilizing the braking pads, weve got you covered to get your wheels back in shape and back on the road in no time!

Cycling is an enjoyable and healthy activity loved by many, but encountering a bent bike wheel can quickly put a damper on your ride. Whether it’s a slight wobble or a more severe bend, addressing this issue promptly is crucial for a smooth and safe cycling experience. While professional help is always an option, there are also simple do-it-yourself solutions to repair a bent bike wheel effortlessly. In this guide, we will explore some DIY methods to straighten a bent bike wheel and get you back on the road in no time.

Understanding the Problem: Identifying a Bent Bike Wheel

Before attempting to repair a bent bike wheel, it’s essential to identify the issue accurately. Signs of a bent wheel include noticeable wobbling while riding, brake pads rubbing against the rim, or an unusual sound coming from the wheel when spinning. Taking the time to pinpoint the problem areas will help determine the best approach for repair.

DIY Solutions for Bent Bike Wheel Repair

Minor Adjustments with a Spoke Wrench

For minor wheel bends, a spoke wrench can be a handy tool for adjusting the tension of individual spokes. Begin by locating the bent section of the wheel and identifying the affected spokes. Use the spoke wrench to tighten or loosen the spokes incrementally, working your way around the wheel to balance the tension. Make small adjustments and regularly check the wheel’s trueness by spinning it to gauge progress.

Utilizing the Braking Pads

In cases where the bend is minimal and primarily affecting one portion of the wheel, utilizing the brake pads can offer a quick fix. Squeeze the brake lever to hold the affected area against the brake pads while spinning the wheel. The friction created against the pads can help straighten out minor bends over time. Remember to release the brake lever periodically to assess the wheel’s progress and prevent overheating.

DIY Truing Stand

Creating a makeshift truing stand can aid in effectively straightening a bent bike wheel. Secure your bike upside down or on a stable stand to allow the wheel to spin freely. Use zip ties or cable ties as makeshift gauges by attaching them to the frame, close to the wheel rim. Observe the distance between the zip ties and the rim as you spin the wheel, adjusting spoke tension accordingly to minimize wobbles and bends.

Safety Precautions and Final Checks

Before embarking on any DIY repairs, ensure your safety by wearing protective gear such as gloves and eye protection. It’s also beneficial to work in a well-lit and spacious area to carry out the repairs efficiently. Once you have straightened the bent bike wheel using the DIY methods outlined, perform a final check by spinning the wheel and observing for any remaining wobbles or irregularities.

Conclusion

Repairing a bent bike wheel doesn’t have to be a daunting task, thanks to these effortless DIY solutions. By understanding the problem, utilizing simple tools like a spoke wrench or brake pads, and incorporating a makeshift truing stand, you can straighten out minor bends and get back to enjoying your cycling adventures. Remember to prioritize safety, take your time with adjustments, and test the wheel thoroughly before hitting the road. With a bit of patience and the right approach, tackling a bent bike wheel can be a satisfying and rewarding endeavor for any cycling enthusiast.

Bike Repairs Made Effortless: Essential Tools for Every Cyclist

Discover the joy of effortless bike repairs with these essential tools for every cyclist. Say goodbye to frustrating breakdowns by equipping yourself with the must-haves like a reliable bike pump and tire levers to handle common issues like flats with ease. Stay ahead of the pack with the right tools in your arsenal for a smooth and stress-free ride every time.

As a cyclist, ensuring your bike is in top-notch condition is essential for a smooth and safe ride. To make bike repairs effortless, having the right tools at your disposal is crucial. Whether you are a beginner or a seasoned rider, having a basic toolkit can save you time and money in the long run. In this article, we will explore the essential tools every cyclist should have to handle common bike repairs with ease.

The Basics: Must-Have Tools

Bike Pump

One of the most critical tools every cyclist should have is a reliable bike pump. Proper tire inflation is vital for a comfortable ride and helps prevent flats. Choose a pump that is compatible with your bike’s valve type, whether it’s a Presta or Schrader valve, to ensure quick and easy inflation.

Tire Levers

Tire levers are essential for removing and installing tires when fixing a flat. These handy tools help you pry the tire off the rim without damaging the tube or tire. Look for durable, lightweight tire levers that can easily fit in your saddlebag or pocket for on-the-go repairs.

Multi-Tool

A multi-tool is a versatile gadget that combines various essential tools in one compact package. From Allen keys and screwdrivers to chain tools and tire levers, a multi-tool can handle a wide range of bike repairs. Invest in a high-quality multi-tool with the right set of functionalities for your bike’s specific components.

Advanced Tools for Deeper Repairs

Chain Breaker Tool

For more advanced repairs like chain maintenance or replacement, a chain breaker tool is a must-have. This tool allows you to remove and install chain pins, adjust chain length, and make quick fixes on the go. Choose a durable and reliable chain breaker that can withstand frequent use.

Cassette Lockring Tool

When it comes to replacing cassettes or making adjustments to your rear gears, a cassette lockring tool is essential. This tool helps you remove and install the cassette lockring with precision, ensuring a smooth gear shifting experience. Make sure to get a compatible tool that fits your cassette type to avoid any issues during repairs.

Essential Maintenance Accessories

Lubricant

Proper lubrication is key to keeping your bike’s moving parts running smoothly. Invest in a high-quality bike-specific lubricant to keep your chain, derailleurs, and other components in top condition. Regularly apply lubricant to prevent wear and reduce friction, extending the lifespan of your bike’s parts.

Cleaning Brushes

Keeping your bike clean is not only aesthetically pleasing but also essential for its performance and longevity. Invest in a set of cleaning brushes designed for bikes to remove dirt, grime, and debris from hard-to-reach areas. Regular cleaning can prevent corrosion and component wear, prolonging the life of your bike.

In conclusion, having the right tools for bike repairs can make a significant difference in your cycling experience. By investing in a basic toolkit that includes must-have tools like a bike pump, tire levers, and a multi-tool, you can handle common repairs with ease. For more advanced repairs, consider adding tools like a chain breaker and cassette lockring tool to your arsenal. Coupled with essential maintenance accessories like lubricant and cleaning brushes, you can keep your bike in top shape and enjoy many more miles of hassle-free riding.

Repair Squeaky Bike Brakes: Effortless Fix Guide

Is the irritating squeaking of your bike brakes putting a damper on your ride? Discover how to effortlessly silence those squeaky bike brakes with our step-by-step guide. Keeping your brakes in tiptop shape has never been easier!

How to Repair Squeaky Bike Brakes: An Effortless Fix Guide

Are your bike brakes making an annoying squeaking sound whenever you ride? Don’t worry; fixing squeaky bike brakes is a common issue that can be easily resolved with a few simple steps. In this guide, we will walk you through the process of diagnosing and repairing squeaky bike brakes so that you can enjoy a smooth and silent ride every time.

Identifying the Cause of Squeaky Brakes

The first step in repairing squeaky bike brakes is to identify the root cause of the noise. Squeaking brakes can be caused by a variety of factors, including dirty or worn brake pads, misaligned brake calipers, or contaminated braking surfaces. By carefully examining your bike’s brake system, you can determine the specific cause of the squeaking noise and proceed with the appropriate solution.

Cleaning and Inspecting Brake Pads

One common cause of squeaky bike brakes is dirty or contaminated brake pads. To fix this issue, start by removing the wheel from the bike and inspecting the brake pads for dirt, debris, or wear. If the brake pads appear dirty, gently clean them with a soft bristle brush and rubbing alcohol. Ensure that the brake pads are free of any residue that may be causing the squeaking noise.

Adjusting Brake Calipers

Misaligned brake calipers can also contribute to squeaky bike brakes. To realign the brake calipers, loosen the mounting bolts that secure the calipers to the frame or fork. Carefully adjust the position of the calipers so that they align with the braking surface of the wheel. Once the calipers are properly aligned, tighten the mounting bolts to secure them in place. This simple adjustment can help eliminate the squeaking noise and improve the performance of your bike brakes.

Replacing Worn Brake Pads

If cleaning and adjusting the brake pads do not resolve the squeaking issue, it may be time to replace the brake pads altogether. Over time, brake pads can wear down and lose their effectiveness, leading to squeaking brakes and reduced stopping power. To replace the brake pads, remove the old pads from the calipers and install new ones according to the manufacturer’s instructions. Be sure to choose brake pads that are compatible with your bike’s braking system for optimal performance.

Maintaining Proper Brake Care

Once you have successfully repaired your squeaky bike brakes, it is essential to maintain proper care to prevent future issues. Regularly inspect your brake pads for wear and contamination, clean your braking surfaces, and perform routine maintenance to ensure that your brakes are functioning correctly. By staying proactive with your brake care, you can enjoy a quiet and reliable braking system on your bike.

Conclusion

Repairing squeaky bike brakes is a simple and straightforward process that can improve your riding experience and safety. By identifying the cause of the squeaking noise, cleaning and adjusting brake components, and maintaining proper care, you can eliminate annoying brake squeaks and enjoy smooth, silent braking on your bike. Follow the steps outlined in this guide to address squeaky bike brakes effortlessly and get back to riding with confidence.

Bike Chain Problems: Easy Fixes and Expert Tips

Is your cycling experience being hindered by pesky **bike chain problems**? From chain slippage to rust, weve got you covered with easy fixes and expert tips to keep your chain in top condition for a seamless ride every time.

Cycling enthusiasts know that maintaining a bike’s chain is crucial for smooth and efficient riding. However, even with the best care, bike chain problems can still arise, causing frustration and hindering your cycling experience. In this article, we will delve into common bike chain issues, easy fixes, and expert tips to keep your chain in top condition and ensure a seamless ride every time.

Common Bike Chain Problems

1. Chain Slippage: One of the most common issues cyclists face is chain slippage, where the chain skips over the cogs or chainrings while pedaling. This could be due to a worn chain, improperly adjusted derailleurs, or a dirty chain.

2. Chain Rust: Exposing your bike chain to moisture and humidity can lead to rust formation over time. Rust not only affects the chain’s performance but also shortens its lifespan.

3. Chain Stretch: Continuous use and lack of proper lubrication can cause the chain to stretch. A stretched chain not only affects the shifting performance but can also wear down the cassette and chainrings faster.

Easy Fixes for Bike Chain Problems

Adjusting the Chain Tension

If you notice chain slippage or hear unusual noises while pedaling, it may be time to check your chain tension. A loose chain can lead to various issues, so make sure to adjust the tension to the manufacturer’s recommended specifications.

Cleaning and Lubricating the Chain

Regularly cleaning and lubricating your bike chain is essential for its longevity and performance. Use a degreaser to remove dirt and grime, then apply a high-quality chain lubricant to ensure smooth operation.

Replacing a Worn Chain

If your chain is excessively worn or stretched, it’s time to replace it. A worn chain can cause damage to other components of your bike and compromise your riding experience. Consult your local bike shop for assistance and choose a high-quality chain for optimal performance.

Expert Tips for Maintaining Your Bike Chain

1. Regular Inspections: Make it a habit to inspect your bike chain for wear and tear regularly. Look out for signs of rust, stretching, or misalignment, and address any issues promptly.

2. Proper Lubrication: Use a lubricant specifically designed for bike chains and apply it sparingly. Over-lubrication can attract dirt and debris, leading to faster wear and potential chain problems.

3. Professional Tune-Ups: Schedule regular maintenance checks with a professional bike mechanic to ensure that your chain and other components are in top condition. A professional tune-up can prolong the life of your bike and prevent costly repairs in the long run.

In conclusion, bike chain problems are common among cyclists but can be easily managed with the right knowledge and maintenance routines. By addressing issues promptly, performing regular maintenance, and following expert tips, you can enjoy a smooth and seamless riding experience every time. Remember, a well-maintained chain not only enhances performance but also prolongs the life of your beloved bike.

Spring and Summer Bike Riding: Unleash Your Best Ride Yet!

Spring biking is in full swing! Dust off your two-wheeled companion and get ready to explore nature in all its blooming glory. With longer days and warmer weather, its the perfect time to embark on a cycling adventure you wont soon forget.

Unleash Your Best Ride Yet This Spring and Summer

Dreaming of the open road, the wind in your hair, and the freedom of the great outdoors? With the arrival of spring and summer, it’s the perfect time to dust off your bike and hit the trails for an unforgettable adventure. Whether you’re a seasoned cyclist or a weekend warrior, there’s something truly magical about exploring the world on two wheels. In this article, we’ll dive into the joys of spring and summer bike riding and how you can make the most of your cycling experience during these glorious seasons.

Exploring Nature on Two Wheels

Spring and summer offer the ideal conditions for bike riding, with longer days, warmer temperatures, and blooming landscapes. As the trees come back to life and flowers bloom, nature provides a stunning backdrop for your cycling escapades. Imagine cruising through lush forests, along sparkling rivers, or up majestic mountainsides. The sights, sounds, and scents of the season only enhance the joy of biking, making every pedal stroke a unique sensory experience.

Preparing Your Bike for the Season Ahead

Before you embark on your spring and summer biking adventures, it’s crucial to ensure that your bike is in top shape. Give it a thorough inspection, checking the tires, brakes, gears, and chain for any signs of wear and tear. Clean and lubricate your bike for smooth operation and optimal performance. Proper maintenance not only ensures your safety on the road but also enhances your riding experience, allowing you to focus on the journey ahead without any mechanical hiccups.

Choosing the Right Gear for Comfort and Safety

Equally important is selecting the right gear to keep you comfortable and safe during your rides. Invest in a quality helmet to protect your head in the event of a fall, and don’t forget to wear bright, reflective clothing to increase your visibility to motorists. Comfortable cycling clothes, padded gloves, and sturdy shoes can make a world of difference in how you feel during long rides. Additionally, consider accessories like water bottles, saddlebags, and bike lights to stay hydrated, carry essentials, and remain visible, especially during evening rides.

Setting Goals and Challenging Yourself

Spring and summer present the perfect opportunity to set new biking goals and challenge yourself to push your limits. Whether it’s conquering a difficult trail, increasing your mileage, or improving your speed and endurance, establishing clear objectives can help keep you motivated and focused. Consider joining group rides, participating in cycling events, or tracking your progress with a cycling app to stay inspired and engaged throughout the season.

Embracing the Joy of Cycling

Above all, remember to savor the simple joys of cycling—the feeling of freedom as you pedal, the rush of adrenaline as you speed down a hill, and the sense of accomplishment as you conquer a challenging climb. Embrace the exhilaration of exploring new paths, discovering hidden gems, and connecting with nature in a unique and intimate way. Whether you ride solo or with friends, spring and summer bike riding offer endless possibilities for adventure, growth, and sheer enjoyment.

In conclusion, spring and summer present the perfect canvas for unleashing your best ride yet. By preparing your bike, choosing the right gear, setting goals, and embracing the joy of cycling, you can make the most of these vibrant seasons and create unforgettable memories on two wheels. So, grab your bike, hit the road, and let the beauty of spring and summer propel you to your next cycling adventure!

Safe Bike Riding: Essential Tips for Beginners

Cycling can be a thrilling adventure, but safety comes first! Whether youre exploring the city or cruising countryside trails, prioritizing safe bike riding ensures every journey is a joyous one. Ready to pedal your way to safety and fun? Lets roll!

Cycling is not only a great way to stay fit and active but also an enjoyable way to explore the outdoors. If you’re new to biking, it’s important to prioritize safety to make your rides both fun and secure. In this article, we will provide essential tips for beginners to ensure safe bike riding experiences.

Choosing the Right Bike

Before you hit the road, it’s crucial to select a bike that suits your needs and fits you properly. Consider factors such as the type of riding you’ll be doing, the bike size, and the features that will enhance your comfort and control while riding.

Essential Safety Gear

Equipping yourself with the right safety gear is paramount when it comes to bike riding. Invest in a good quality helmet that fits snugly on your head to protect you in case of falls or accidents. Additionally, wear bright clothing to make yourself visible to other road users, especially in low-light conditions.

Familiarize Yourself with Traffic Rules

As a beginner cyclist, it’s vital to understand and follow traffic rules and regulations. Learn about hand signals, road signs, and proper lane positioning to ride safely alongside other vehicles. Always ride predictably and defensively to minimize the risk of accidents.

Practice Bike Handling Skills

To boost your confidence and safety on the bike, practice essential bike handling skills such as braking, shifting gears, and maintaining balance. Find a safe and quiet area to practice these skills before venturing into busier roads or trails.

Maintain Your Bike

Regular maintenance of your bike is key to ensuring a safe and enjoyable riding experience. Check your bike’s tires, brakes, and overall condition before each ride to prevent mechanical issues that could compromise your safety on the road.

Ride with Awareness

Stay alert and aware of your surroundings while riding. Avoid distractions such as using your phone or wearing headphones that can impair your ability to hear approaching vehicles or emergency sirens. Keep a safe distance from other cyclists and vehicles on the road.

Choose Safe Routes

When planning your rides, opt for routes with designated bike lanes or paths whenever possible. Avoid high-traffic areas and opt for quieter roads or trails where you can ride comfortably without feeling overwhelmed by traffic.

Ride with Others

Consider riding with a buddy or joining a local cycling group to enhance your safety on the road. Riding with others not only provides social benefits but also increases visibility and adds an extra layer of safety, especially on long rides.

Stay Hydrated and Energized

Always carry water and snacks to stay hydrated and energized during your rides. Proper hydration and nutrition are essential for maintaining energy levels and focus while cycling, particularly on longer rides.

Enjoy the Ride

Above all, remember to have fun and enjoy the experience of bike riding. Embrace the freedom and joy that cycling brings while prioritizing your safety and well-being on every ride.

In conclusion, safe bike riding for beginners involves a combination of knowledge, skills, and preparation. By following these essential tips, you can make your cycling adventures both safe and enjoyable. So gear up, hop on your bike, and explore the world on two wheels with confidence and safety in mind. Happy riding!