Bike Maintenance: Effortless Tips for Cleaning Your Bike after Every Ride

Discover the joy of hassle-free bike maintenance with effortless tips for cleaning your bike after every ride. Say goodbye to dirt and grime buildup with these quick and easy steps to keep your bike safe and enjoyable. Keep your wheels spinning smoothly and explore with peace of mind.

Effortless Tips for Cleaning Your Bike after Every Ride

Cycling is not only a great way to stay fit and explore new places, but it also gives a sense of freedom and joy. Proper bike maintenance is crucial to ensure that your ride is safe and enjoyable. One essential aspect of bike maintenance is cleaning your bike after every ride. Regular cleaning not only prolongs the life of your bike but also helps in identifying any potential issues before they escalate. In this article, we will discuss some effortless tips for cleaning your bike after every ride.

Why Cleaning Your Bike Is Important

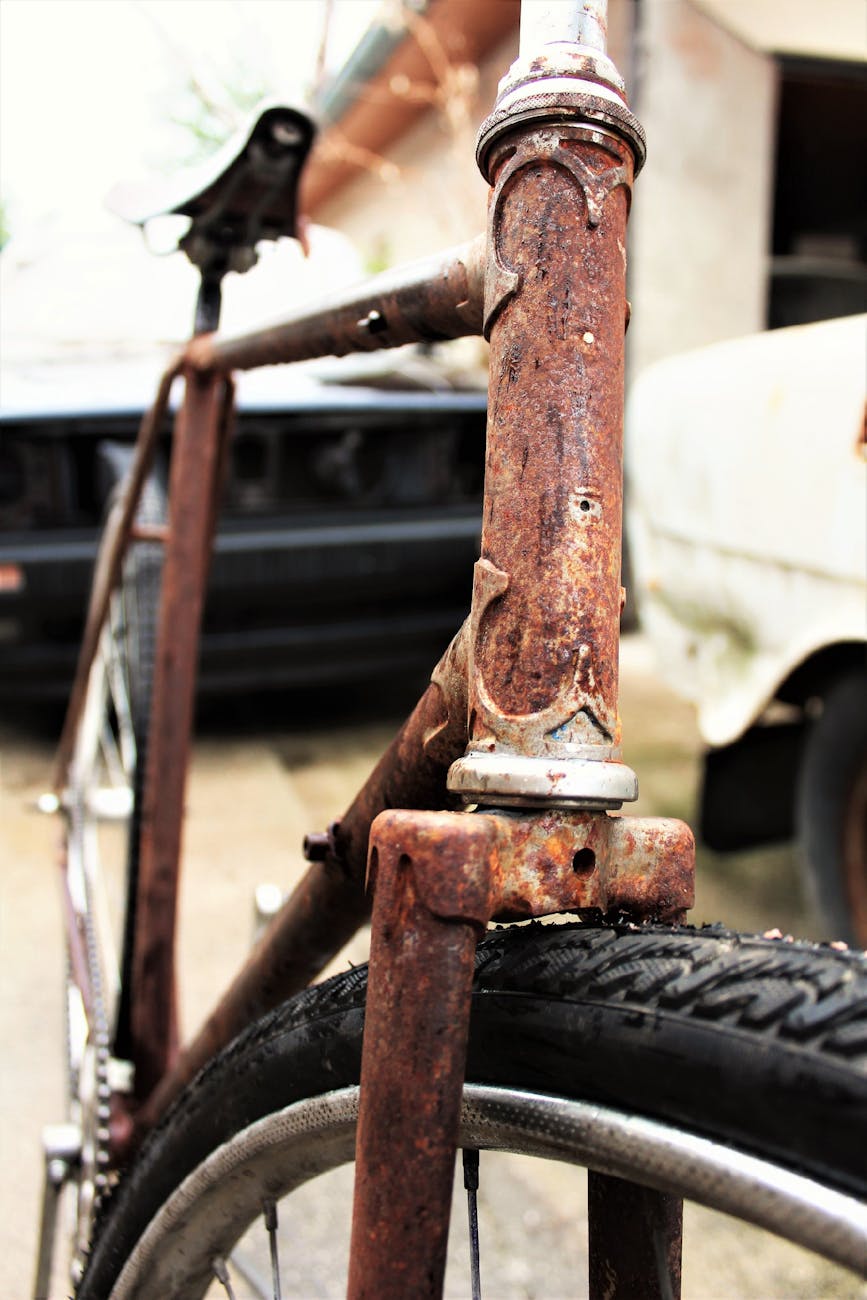
Before delving into the tips for cleaning your bike, it’s essential to understand why this routine task is so crucial. After every ride, your bike accumulates dirt, grime, and other contaminants that can affect its performance and longevity. Regular cleaning not only improves the aesthetics of your bike but also prevents premature wear and tear on its components. Additionally, by cleaning your bike after each ride, you are more likely to spot any issues such as loose bolts, worn-out chains, or tire damage before they become serious problems.

Effortless Tips for Cleaning Your Bike

1. Gather Your Cleaning Supplies: Before starting the cleaning process, gather all the necessary supplies. You will need a bucket of warm soapy water, a sponge or brush, degreaser, chain lubricant, a clean towel, and a bike stand to keep your bike stable during cleaning.

2. Rinse Your Bike: Begin by rinsing your bike with water to remove any loose dirt and debris. Use a hose or a bucket of water to gently spray the bike, starting from the top and working your way down.

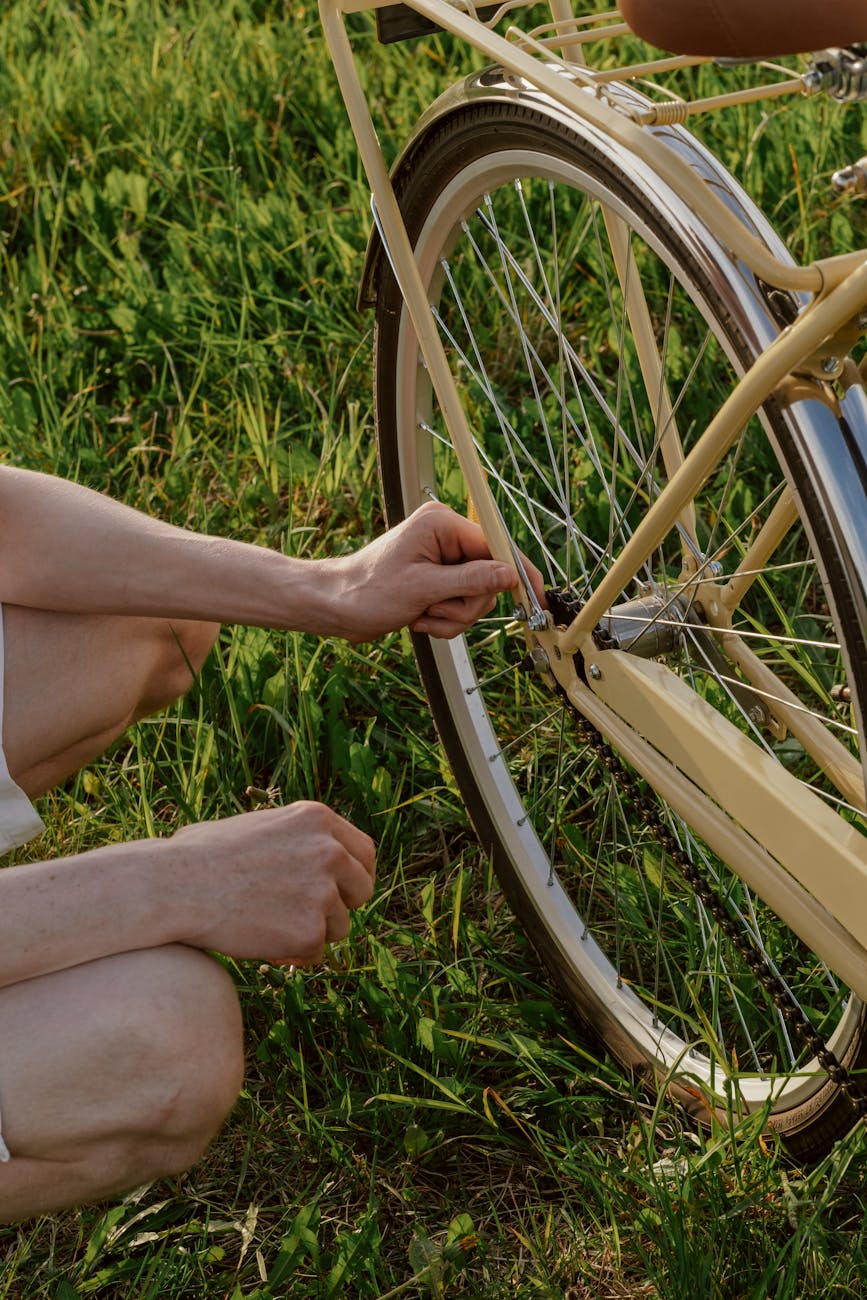
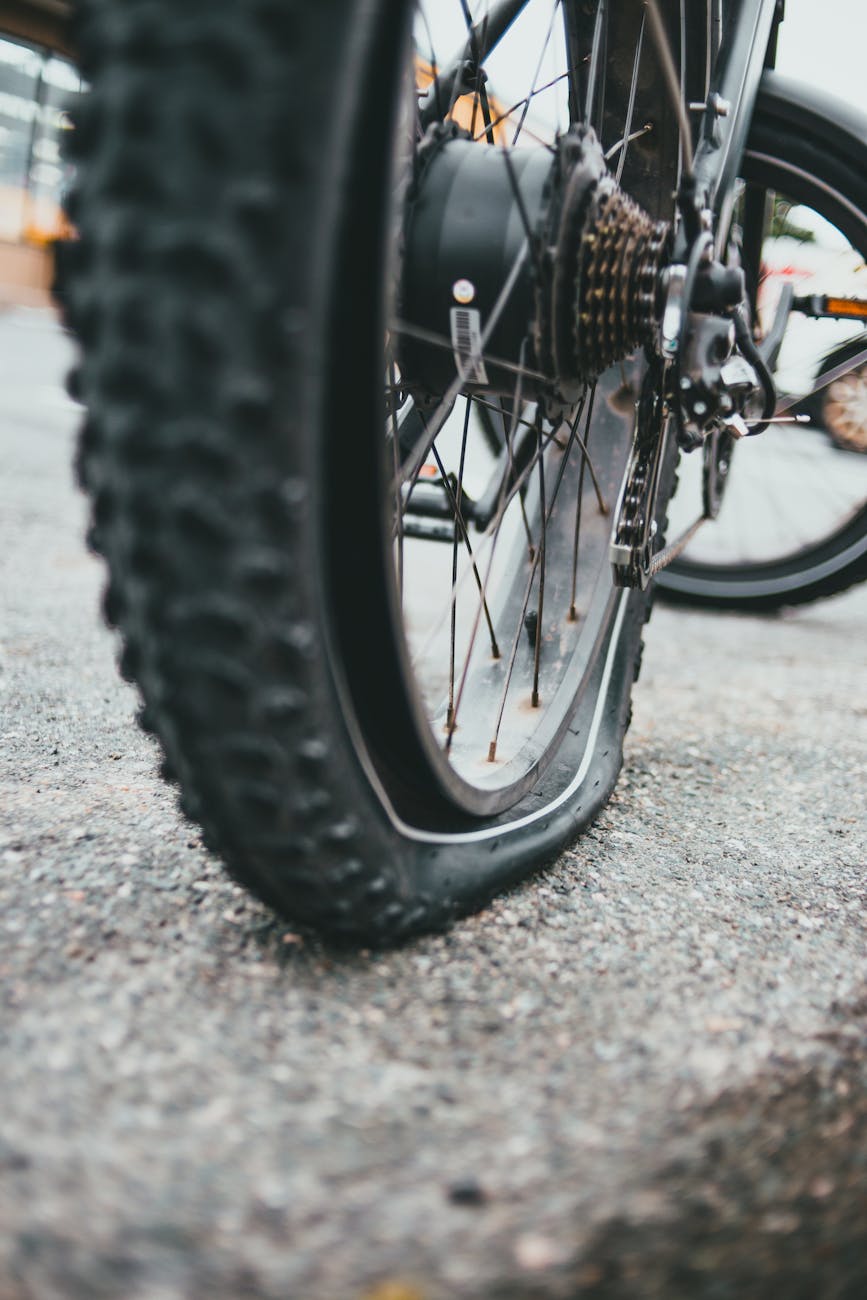
3. Clean the Frame and Wheels: Dip a sponge or brush into the soapy water and gently scrub the frame, wheels, and other accessible parts of the bike. Pay special attention to areas with heavy dirt buildup. For stubborn grime, you may need to use a degreaser to effectively clean the components.

4. Clean the Chain and Drivetrain: The chain and drivetrain are crucial components of your bike that require regular cleaning and lubrication. Use a chain cleaning tool or a brush to clean the chain, cassette, and chainrings. Apply a suitable chain lubricant to ensure smooth operation and prevent rust.

5. Dry and Lubricate: Once you have cleaned all the parts of your bike, rinse off the soapy water and dry the bike thoroughly with a clean towel. Avoid air-drying your bike as this can lead to water spots and corrosion. After drying, apply a thin layer of lubricant to the chain, derailleur pivots, and other moving parts to ensure optimal performance.

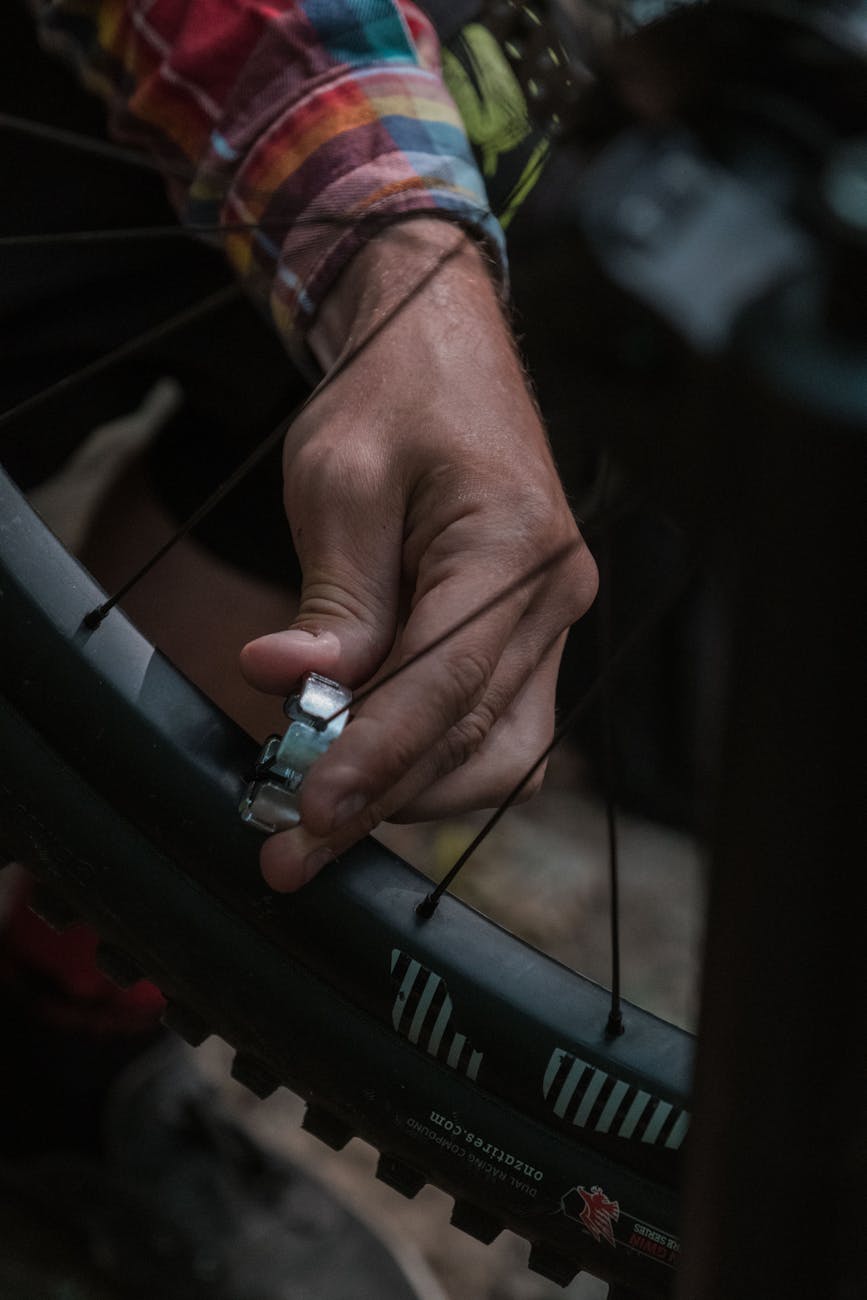
6. Check for Damage and Wear: While cleaning your bike, take the opportunity to inspect all components for any signs of damage or wear. Look for loose bolts, frayed cables, worn brake pads, and any other issues that may affect the performance of your bike. Address any problems promptly to prevent further damage.

By following these effortless tips for cleaning your bike after every ride, you can maintain the performance, longevity, and appearance of your bike. Regular cleaning not only enhances your riding experience but also saves you money on costly repairs in the long run. Remember that a well-maintained bike is a safe and reliable companion on all your cycling adventures.

Bike Maintenance Checklist: Optimize Performance with Ease

Get ready to hit the road with confidence using our bike maintenance checklist! By following these simple steps regularly, you can optimize your bikes performance and ensure a smoother ride every time. Dont miss out on these easy maintenance tips – your bike will thank you!

Title: Easy Bike Maintenance Checklist to Optimize Performance

Bicycles are not only a convenient mode of transportation and a source of recreation but also require regular maintenance to ensure they are in good working condition. By following a comprehensive bike maintenance checklist, you can optimize your bike’s performance, increase its lifespan, and enjoy a smoother and safer riding experience. Whether you are a seasoned cyclist or a beginner, incorporating regular maintenance into your routine can make a significant difference in how your bike performs. In this article, we will guide you through an easy bike maintenance checklist to help keep your bicycle in top shape.

Inspect and Clean Your Bike Regularly
To start your bike maintenance routine, the first step is to inspect your bike regularly. Before each ride, take a few minutes to check for any visible issues such as loose bolts, worn-out parts, or dirt accumulation. Inspecting your bike will help you identify potential problems early on and prevent them from escalating into more serious issues. After inspecting your bike, cleaning it is the next crucial step. Use a gentle bike-specific cleaner or mild soap and water to clean the frame, drivetrain, wheels, and other components. Regular cleaning not only keeps your bike looking good but also helps prevent premature wear and tear.

Lubricate Moving Parts
Lubricating the moving parts of your bike is essential for smooth operation and longevity. Apply lubricant to the chain, derailleurs, cables, and pivot points to reduce friction and wear. Check the manufacturer’s recommendations for the appropriate type of lubricant to use based on your riding conditions and the components of your bike. Regularly lubricating your bike will not only optimize its performance but also extend the life of these critical components.

Check Tire Pressure and Condition
Maintaining proper tire pressure is crucial for optimal performance and safety. Check your tire pressure regularly using a pressure gauge and inflate the tires to the recommended psi (pounds per square inch) indicated on the sidewall of the tire. Inspect the tires for any signs of wear, cuts, or embedded debris that may affect their performance. Replace worn-out tires promptly to prevent punctures and ensure a comfortable ride.

Inspect Brakes and Adjust as Needed
Brakes are a critical safety component of your bike, and it is essential to regularly inspect and adjust them as needed. Check the brake pads for wear and replace them if they are worn down. Ensure that the brake levers are functioning correctly and that the brakes engage smoothly and evenly. Adjust the brake pads and calipers if necessary to maintain proper braking performance.

Check and Adjust the Gears
Smooth gear shifting is essential for an enjoyable riding experience. Regularly check the gears, shifters, and derailleurs for proper function and alignment. Inspect the chain and cassette for signs of wear and replace them if necessary. Adjust the gear cables and derailleurs to ensure precise shifting and smooth transitions between gears. Properly functioning gears will enhance your bike’s performance and make your rides more efficient.

Final Thoughts
Regular bike maintenance is key to optimizing performance, increasing the lifespan of your bike, and ensuring a safe and enjoyable riding experience. By following a simple maintenance checklist and incorporating it into your routine, you can keep your bike in top condition. Remember to inspect, clean, lubricate, and check essential components such as tires, brakes, gears, and more regularly. With proper maintenance, your bike will reward you with countless memorable rides for years to come. So, take the time to care for your bike, and it will take you places with ease and efficiency.

Beginner-Friendly Bike Repair Hacks | Effortless Tips for Budget-conscious Cyclists

Whether youre a casual rider or a seasoned cyclist, these beginner-friendly bike maintenance tips will make keeping your bike in top shape a breeze. From essential tools to proper tire maintenance and learning basic brake adjustments, these effortless hacks are perfect for budget-conscious cyclists looking to enjoy a smoother ride. So, grab your bike multi-tool and get ready to roll with confidence!

Cycling is a fantastic way to stay active, explore the outdoors, and promote a healthy lifestyle. However, maintaining your bike can sometimes feel daunting, especially if you’re on a budget. Fortunately, there are several beginner-friendly bike repair hacks that can help you keep your bike in top shape without breaking the bank. Whether you’re a casual rider or a seasoned cyclist, these effortless tips will make maintenance more manageable and enjoyable.

1. Essential Tools Every Cyclist Needs
Before diving into bike repair, it’s crucial to have the right tools. While professional bike repair kits can be expensive, you can start with some basic essentials that won’t cost a fortune. Invest in a quality bike multi-tool, tire levers, a pump, and chain lubricant. These tools will come in handy for most basic repairs and maintenance tasks.

2. Keep Your Bike Clean
Regular cleaning is essential for bike maintenance. Use a gentle bike-specific cleaner or mild soap and water to clean the frame, wheels, and drivetrain. A clean bike not only looks better but also performs better. Remember to avoid using high-pressure water, as it can damage sensitive components.

3. Check and Inflate Your Tires
Proper tire maintenance is key to a smooth and safe ride. Check your tire pressure regularly using a gauge and ensure they are inflated to the recommended PSI (pounds per square inch) as indicated on the sidewall of the tire. Underinflated tires can lead to increased rolling resistance and more frequent punctures.

4. Learn Basic Brake Adjustments
Brakes are a crucial safety feature on your bike, so it’s essential to keep them in good working condition. Learn how to adjust your brake pads so that they are aligned properly with the rim. Additionally, check the brake cables for signs of wear and replace them if necessary. Properly functioning brakes can prevent accidents and ensure a safe ride.

5. Master the Art of Chain Maintenance
A well-lubricated chain is essential for smooth shifting and efficient pedaling. Keep your chain clean by regularly wiping off dirt and grime with a rag. Apply a bicycle-specific chain lubricant and wipe off any excess to prevent attracting more dirt. A well-maintained chain will extend the life of your drivetrain components and improve overall performance.

6. Tighten Loose Bolts
Regularly check all the bolts on your bike, including those on the stem, handlebars, seat post, and pedals. Loose bolts can lead to unwanted creaking noises and compromise the structural integrity of your bike. Use a torque wrench to ensure that bolts are tightened to the manufacturer’s specifications.

7. Learn How to Fix a Flat Tire
Flat tires are a common occurrence for cyclists, but they don’t have to ruin your ride. Learn how to fix a flat tire by carrying a spare tube, tire levers, and a pump with you on every ride. Practice changing a tube at home so you’ll be prepared when you encounter a flat on the road.

By following these beginner-friendly bike repair hacks, you can save money on professional repairs and keep your bike in excellent condition. Remember that regular maintenance is the key to a long-lasting and enjoyable riding experience. With a little bit of effort and know-how, you can become a self-sufficient cyclist and tackle basic repairs with confidence. Happy riding!

Bike Handlebar Tape Replacement Made Easy

Ready to give your bike a fresh new look and feel? Replacing your bike handlebar tape is a simple and cost-effective way to upgrade your ride. Dive into this step-by-step guide to bike handlebar tape replacement and transform the aesthetics and comfort of your cycling experience effortlessly.

Bike Handlebar Tape Replacement Made Easy

Are you looking to give your bike a fresh new look and feel? One simple and cost-effective way to upgrade your ride is by replacing the handlebar tape. This quick and easy maintenance task can make a world of difference in both the aesthetics and comfort of your bike. In this article, we will guide you through the process of replacing your bike handlebar tape step by step, making it a breeze for even beginners to accomplish.

Choosing the Right Tape
Before you start the replacement process, you’ll need to choose the right handlebar tape for your bike. Handlebar tapes come in various materials, colors, and textures, so make sure to select one that suits your preferences and riding style. Cork, foam, and gel tapes are some popular options, each offering different levels of cushioning and grip. Consider factors like durability, sweat absorption, and how the tape feels in your hands when making your selection.

Preparing the Handlebars
To begin the replacement process, start by removing the old tape from your handlebars. Carefully unwrap the existing tape, taking care not to damage the handlebar surface. Once the old tape is removed, clean the handlebars thoroughly to ensure a smooth and residue-free surface for the new tape. You can use a clean rag with rubbing alcohol to wipe down the handlebars and remove any dirt or sticky residue.

Applying the New Tape
Now comes the fun part – applying the new handlebar tape. Start at one end of the handlebar and secure the tape with the adhesive backing provided. Wrap the tape tightly around the handlebars, overlapping each wrap slightly to ensure full coverage. Make sure to keep the tape taut as you go to prevent any wrinkles or slack. As you reach the end of the handlebar, cut the tape to size and secure it in place with the finishing tape or plugs included in the package.

Finishing Touches
Once the new tape is securely in place, take a moment to smooth out any wrinkles or imperfections in the tape. You can also adjust the tape’s position slightly to ensure a uniform appearance along the length of the handlebars. Finally, check that the end caps or plugs are securely in place to prevent the tape from unraveling during your rides.

Benefits of Handlebar Tape Replacement
Replacing your bike’s handlebar tape not only enhances the bike’s appearance but also improves your riding experience. Fresh handlebar tape provides better grip and cushioning, reducing hand fatigue and improving comfort on long rides. Additionally, a well-maintained handlebar tape can enhance the overall durability of your bike’s handlebars by protecting them from moisture and wear.

In conclusion, replacing your bike handlebar tape is a simple yet rewarding task that can give your bike a new lease on life. By following the steps outlined in this article, you can easily transform the look and feel of your bike with minimal effort and cost. So why wait? Grab a new roll of handlebar tape and get ready to enjoy a smoother and more stylish ride on your bike.

Bike Suspension Repair: Effortless Solution for a Smooth Ride

Is your bike feeling a bit bumpy or stiff on your rides? Dont let a faulty suspension system hold you back from a smooth and enjoyable biking experience. Discover the effortless solution for a smoother ride with professional bike suspension repair!

When it comes to ensuring a smooth and enjoyable bike ride, one crucial aspect that often gets overlooked is the suspension system. A well-maintained and properly functioning bike suspension can make a significant difference in your comfort, control, and overall riding experience. If you’ve noticed any issues with your bike’s suspension, such as stiffness, sagging, or creaking noises, it might be time to consider bike suspension repair. By addressing these issues promptly, you can enhance the performance of your bike and enjoy a smoother, more comfortable ride.

Understanding Bike Suspension Systems

Before delving into bike suspension repair, it’s essential to understand the basic components of a bike’s suspension system. Most modern bikes come equipped with either front suspension (fork) or full suspension (front and rear shock absorbers). The suspension system’s primary function is to absorb shock from rough terrain, maintaining traction and stability while minimizing the impact on the rider’s body.

Signs That Your Bike Suspension Needs Repair

Recognizing the signs of a faulty suspension system is vital for ensuring your safety and maximizing your riding experience. Some common indicators that your bike’s suspension may need attention include:

1. Stiffness: If your suspension feels rigid and lacks the smooth travel it once had, it may be a sign of worn-out components or a need for servicing.
2. Sagging: Excessive sagging in your suspension can affect the bike’s handling and responsiveness, indicating a potential issue with the spring or damping mechanism.
3. Unusual Noises: Creaking, clunking, or squeaking noises when compressing the suspension are signals of possible damage or worn parts that need replacement.
4. Fluid Leakage: Visual signs of oil or fluid leaks around the suspension components can indicate seal damage or other internal issues.

Benefits of Bike Suspension Repair

Addressing suspension issues through timely repair or servicing can offer several benefits, including:

1. Improved Comfort: A properly functioning suspension system absorbs shocks and vibrations, making your ride smoother and more comfortable.
2. Enhanced Control: A well-tuned suspension system provides better traction and handling, allowing you to navigate rough terrain with greater ease and confidence.
3. Longevity: Regular maintenance and repair help extend the lifespan of your suspension components, preventing costly replacements down the line.
4. Safety: A well-maintained suspension system ensures optimal performance, reducing the risk of accidents caused by poor handling or compromised stability.

Expert Bike Suspension Repair Services

While some basic suspension maintenance tasks can be performed at home, complex repairs and tuning are best left to professional bike mechanics. Expert technicians have the knowledge, skills, and specialized tools needed to diagnose issues accurately and provide tailored solutions for your bike’s suspension system.

When seeking bike suspension repair services, look for a reputable bike shop or service center with experience in handling suspension systems. A thorough inspection, including assessing shock and fork performance, fluid levels, seals, and alignment, is essential to identify any underlying issues and ensure comprehensive repair and tuning.

Conclusion

In conclusion, prioritizing the health and performance of your bike’s suspension system is key to enjoying a smooth, comfortable ride on any terrain. By recognizing the signs of suspension issues early on and investing in professional repair and maintenance services when needed, you can optimize your biking experience and prolong the longevity of your beloved two-wheeled companion. Remember, a well-tuned suspension not only enhances performance but also adds to the overall joy and satisfaction of cycling.

Fix Wobbly Bike Seat: Effortless Adjustments

Tired of dealing with a wobbly bike seat? Say goodbye to discomfort with these effortless solutions to fix your wobbly bike seat in no time!

Effortless Solutions to Fixing a Wobbly Bike Seat

Having a wobbly bike seat can be quite frustrating for any cyclist, as it can lead to discomfort and even affect your riding performance. However, fixing a wobbly bike seat is a quick and easy task that can be done with just a few simple adjustments. In this article, we will explore some effortless solutions to help you fix a wobbly bike seat and get back to enjoying your rides without any discomfort.

Identifying the Issue

Before you can fix a wobbly bike seat, it’s important to identify the root cause of the problem. A loose seat post clamp or an improperly adjusted saddle angle are common reasons why a bike seat may wobble. By understanding what’s causing the wobble, you can implement the right solution to fix it effectively.

Adjusting the Seat Post Clamp

One of the main reasons for a wobbly bike seat is a loose seat post clamp. To fix this issue, start by locating the bolt that secures the seat post clamp. Use an appropriate tool, such as an Allen key or a wrench, to tighten the bolt. Make sure to tighten it securely, but avoid overtightening as this may damage the clamp or the seat post.

Checking Saddle Angle

Another common cause of a wobbly bike seat is an improperly adjusted saddle angle. To check the saddle angle, place a level on top of the saddle to see if it is parallel to the ground. If the saddle is tilted forward or backward, adjust the angle by loosening the saddle clamp bolts and repositioning the saddle to the desired angle. Once you’ve adjusted the angle, tighten the bolts securely to prevent any movement.

Inspecting the Seat Post

In some cases, a wobbly bike seat may be caused by a damaged or worn-out seat post. Inspect the seat post for any signs of damage, such as cracks or bends. If you notice any damage, it’s best to replace the seat post with a new one to ensure a secure and stable fit for your bike seat.

Regular Maintenance

To prevent your bike seat from becoming wobbly in the future, it’s important to perform regular maintenance checks on your bike. Check the seat post clamp, saddle angle, and seat post for any signs of wear or damage, and make adjustments as needed. By keeping your bike in good condition, you can enjoy comfortable and smooth rides without any interruptions.

In conclusion, fixing a wobbly bike seat is a simple task that can be done with just a few adjustments. By identifying the root cause of the wobble and implementing the right solutions, you can ensure a secure and stable fit for your bike seat. Remember to perform regular maintenance checks on your bike to prevent any issues and enjoy a comfortable riding experience every time.

Rusty Bike Parts Restoration Tips: Effortless Cleaning Advice

Say goodbye to rusty bike parts and hello to a smooth ride with our effortless cleaning tips for tackling the pesky problem of rusty bike parts. Lets restore your trusty wheels to their former glory in no time!

Effortless Cleaning Advice for Rusty Bike Parts

Riding a bike is not just a mode of transportation; it’s a lifestyle for many enthusiasts. However, over time, even the most well-kept bikes can develop rust on their parts, affecting both the aesthetics and performance. But fret not, as there are ways to tackle this common issue and restore your rusty bike parts to their former glory. In this article, we will provide you with effortless cleaning advice for rusty bike parts so you can enjoy a smooth and safe ride.

Understanding Rust on Bike Parts

Before diving into the cleaning process, it’s essential to understand what causes rust on bike parts. Rust forms when iron or steel comes into contact with oxygen and moisture, leading to the oxidation process. This can happen due to exposure to rain, humidity, or even sweat from your hands during rides. If left untreated, rust can weaken the structural integrity of the affected parts, potentially compromising your safety while cycling.

Tools You’ll Need

To start the cleaning process, gather the following tools:

1. Steel Wool or Wire Brush: Ideal for removing surface rust without damaging the underlying metal.
2. White Vinegar: An effective, eco-friendly solution for loosening tough rust.
3. Lemon Juice: Contains citric acid, which helps break down rust.
4. Baking Soda: Useful for scrubbing away rust and corrosion.
5. Microfiber Cloth: For drying and polishing the cleaned parts.
6. Rust Converter: Converts rust into a paintable surface, preventing further corrosion.

Step-by-Step Cleaning Process

Now that you have your tools ready, follow these steps to clean your rusty bike parts with ease:

1. Remove the Rust: Use steel wool or a wire brush to scrub away the surface rust from the affected parts. Be gentle to avoid scratching the metal underneath.

2. Soak in Vinegar: For stubborn rust, soak the parts in white vinegar for a few hours or overnight. The acidity of the vinegar helps to break down the rust, making it easier to remove.

3. Scrub with Lemon Juice: Apply lemon juice directly to the rusted areas and scrub with a brush or sponge. The citric acid in lemon juice works as a natural rust remover.

4. Baking Soda Paste: Make a paste using baking soda and water, then apply it to the rusted parts. Let it sit for an hour before scrubbing with a brush. Rinse thoroughly with water.

5. Dry and Protect: Once the rust is removed, dry the parts thoroughly with a microfiber cloth. Apply a rust converter to the cleaned surfaces to prevent future corrosion.

Maintenance Tips to Prevent Rust

To avoid dealing with rusty bike parts in the future, follow these maintenance tips:

– Regularly clean and dry your bike after rides, especially if you’ve been cycling in wet conditions.
– Apply a protective coating of wax or bike-specific rust inhibitor to vulnerable parts.
– Store your bike in a dry, sheltered area when not in use to prevent exposure to moisture.

By following these effortless cleaning tips and maintaining a consistent maintenance routine, you can keep your bike looking and performing its best for years to come. So, grab your tools, roll up your sleeves, and give your rusty bike parts the TLC they deserve. Happy riding!

Emergency Bike Repairs: Essential Tips for Quick Fixes

When your bike hits a bump in the road, dont panic – youve got this! With our essential tips for emergency bike repairs, youll be back on two wheels in no time. Stay prepared and pedal on with confidence through unforeseen obstacles.

Biking is an enjoyable and eco-friendly mode of transportation and recreation, but like any mechanical device, bikes can encounter issues that may require immediate attention. Whether you are commuting to work, going for a leisurely ride, or participating in a cycling event, knowing how to perform emergency bike repairs can save you from being stranded and ensure a smooth and safe journey. In this article, we will discuss essential tips for quick fixes to common bike problems that you may encounter while out on the road.

Identifying the Issue:

The first step in addressing any bike problem is to pinpoint the issue. If you experience a sudden change in the ride quality, strange noises, or difficulty pedaling, it’s crucial to stop and inspect your bike. Look for visible signs of damage, such as a flat tire, loose bolts, or a broken chain.

Fixing a Flat Tire:

One of the most common issues cyclists face is a flat tire. To fix a flat tire quickly, carry a spare inner tube, tire levers, and a portable pump with you. Start by removing the wheel from the bike, using tire levers to take off the tire, and replacing the inner tube with the spare. Make sure to check the inside of the tire for any sharp objects that may have caused the flat before reassembling the wheel.

Adjusting the Chain:

A loose or off-track chain can cause difficulty in pedaling and even lead to chain derailment. To adjust the chain, shift the gears to the smallest cog in the rear and the smallest chainring in the front. If the chain is loose, use the rear derailleur’s barrel adjuster to tighten it. If the chain keeps slipping, check the chain tension and adjust it accordingly with the help of a chain tool.

Brakes Maintenance:

Ensure your brakes are in good condition by checking the brake pads for wear and adjusting the cable tension if necessary. Squeeze the brake levers to assess the braking power and make adjustments using the barrel adjuster on the brake calipers. If your brakes are making unusual sounds or feel spongy, it’s essential to address these issues promptly.

Quick Gear Fixes:

If you experience issues with shifting gears smoothly, this can impact your riding experience significantly. To address gear problems, check the cable tension, limit screws, and derailleur alignment. Make minor adjustments using the barrel adjusters on the shifters to ensure precise gear changes.

Proper Tool Kit:

A well-equipped tool kit can make a significant difference when it comes to emergency bike repairs. Essential items to include in your kit are a multi-tool with various wrench sizes, tire levers, spare inner tubes, a portable pump, chain lubricant, and a patch kit. Familiarize yourself with how to use these tools before hitting the road.

Safety Precautions:

While it’s crucial to know how to perform quick fixes on your bike, safety should always be a top priority. When making roadside repairs, find a safe location off the road, signal to other cyclists and drivers, and wear reflective clothing if riding at night. If the issue is beyond your expertise, don’t hesitate to seek help from a professional bike mechanic.

In conclusion, being prepared for emergency bike repairs can help you handle unexpected situations with confidence and ensure a seamless riding experience. By familiarizing yourself with these essential tips for quick fixes and carrying a well-equipped tool kit, you can tackle common bike problems on the go and get back on the road in no time. Remember, regular bike maintenance and inspections can prevent many issues, but knowing how to address them swiftly can make all the difference in enjoying a trouble-free ride. Happy cycling!

Replace Bike Cables for Effortless Shifting: Expert Guide

Is your bike struggling to shift smoothly or feeling a bit sluggish? It might be time to consider a bike cables replacement. By replacing your worn-out cables, you can enjoy effortless gear changes and a smoother riding experience. Find out why its essential and how to do it right in our expert guide on replacing bike cables.

Cycling enthusiasts know the importance of smooth gear shifting for an enjoyable riding experience. One crucial component that directly contributes to the efficiency of gear changing is the bike cables. Over time, cables can wear out, fray, or become corroded, affecting the performance of your bicycle. To ensure effortless shifting on your bike, it’s essential to replace the cables periodically. In this expert guide, we will walk you through the process of replacing bike cables, highlighting the importance of this maintenance task and providing valuable tips for a successful cable replacement.

Why Replace Bike Cables?

Bike cables play a vital role in transferring the force applied to the shifters to the derailleurs, enabling smooth and precise gear changes. Over time, cables can stretch, accumulate dirt and grime, or develop kinks and frays, leading to sluggish shifting performance. Replacing worn-out cables can make a significant difference in how your bike performs, ensuring that shifting is effortless and accurate, especially during critical moments like steep climbs or rapid descents.

Signs that Your Bike Cables Need Replacement

If you notice any of the following signs, it’s likely time to replace your bike cables:
– Difficulty shifting gears smoothly
– Spongy or inconsistent feel when operating the shifters
– Visible fraying, rust, or corrosion on the cables
– Sluggish response or delayed shifting

Steps to Replace Bike Cables

1. Gather the Necessary Tools: Before you begin, make sure you have the required tools handy, including cable cutters, new cables, cable housing, ferrules, and a set of Allen keys.

2. Prepare Your Bike: Shift to the smallest chainring and cog to relieve tension on the cables. Remove the old cables by detaching them from the derailleurs and shifters.

3. Replace Cables and Housing: Cut the new cables to the appropriate lengths, thread them through the housing, and secure them in place using ferrules. Make sure the cables are routed correctly to the front and rear derailleurs.

4. Adjust Cable Tension: Fine-tune the cable tension by using barrel adjusters at the shifters or derailleurs. Test the shifting through the full range of gears to ensure smooth operation.

5. Trim Excess Cables: Trim any excess cable length to prevent interference with the wheels or other components. Use cable end caps to secure the cable ends and prevent fraying.

6. Test the Shifting: Take your bike for a test ride to check the effectiveness of the new cables. Shift through all the gears to ensure that the shifting is crisp and precise.

Benefits of Regular Cable Replacement

Regularly replacing your bike cables offers several benefits, including:
– Improved shifting performance
– Enhanced overall ride quality
– Extended component lifespan
– Reduced maintenance costs in the long run

Conclusion

Replacing bike cables is a simple yet crucial maintenance task that can enhance your cycling experience significantly. By following the steps outlined in this expert guide and staying attentive to the signs indicating cable wear, you can ensure that your bike’s shifting remains effortless and reliable. Don’t underestimate the impact of well-maintained cables on your riding enjoyment – invest the time and effort in cable replacement to keep your bike in top shape for many rides to come.

Fix Broken Bike Spoke: Essential Beginners’ Guide

Discover the satisfaction of solving a common cycling woe with our Fix Broken Bike Spoke: Essential Beginners Guide. Learn how to expertly fix broken spokes and get back on the road in no time. Master this essential skill, whether youre a newbie or a seasoned cyclist.

Cycling is a fantastic way to stay active and enjoy the outdoors, but encountering a broken bike spoke can quickly turn a leisurely ride into a frustrating experience. Whether you’re a seasoned cyclist or just starting out, knowing how to fix a broken bike spoke is an essential skill to have. In this beginners’ guide, we’ll walk you through everything you need to know to get back on the road quickly and safely.

Understanding the Problem: Identifying a Broken Bike Spoke

The first step in fixing a broken bike spoke is identifying the issue. A broken spoke can cause your wheel to wobble, make unusual noises, or rub against the brakes. If you suspect a broken spoke, inspect your wheel carefully to locate the damaged spoke. It’s crucial to address the issue promptly to prevent further damage to your wheel or the surrounding spokes.

Gathering the Necessary Tools: What You’ll Need

Before attempting to fix a broken bike spoke, gather the necessary tools. You’ll need a spoke wrench, a replacement spoke of the correct length, a screwdriver, and a pair of pliers. These tools are essential for removing the broken spoke and installing the new one correctly. Having everything on hand will streamline the repair process and ensure your bike is back in working order in no time.

Step-by-Step Guide to Fixing a Broken Bike Spoke

1. Remove the Broken Spoke: Begin by removing the broken spoke from your wheel using a spoke wrench. Carefully unscrew the spoke nipple and detach the broken spoke from the wheel.

2. Install the New Spoke: Insert the replacement spoke into the hub and thread it through the appropriate holes in the wheel. Use your spoke wrench to tighten the nipple, ensuring the spoke is securely in place.

3. Adjust the Tension: Once the new spoke is installed, check the tension of the surrounding spokes. Use your spoke wrench to adjust the tension as needed, ensuring that the wheel is well-balanced and spins smoothly.

4. True the Wheel: To true the wheel, spin it slowly and observe any wobbles or unevenness. Make small adjustments to the tension of the spokes as necessary to straighten the wheel and eliminate any wobbles.

Tips for Preventing Future Breakages

Preventing future broken spokes is essential for maintaining the longevity of your bike. Here are some tips to help minimize the risk of spoke breakage:

Regular Maintenance: Schedule routine maintenance checks to ensure your spokes are in good condition.
Avoid Overloading: Avoid carrying heavy loads on your bike, as this can put excess stress on the spokes.
Proper Inflation: Keep your tires inflated to the recommended pressure to prevent excessive strain on the wheel.

By following these tips and techniques, you’ll be well-equipped to fix a broken bike spoke and get back on the road with confidence. Remember, practice makes perfect, and don’t hesitate to seek professional help if you encounter any difficulties. Happy cycling!