Bent Bike Wheel Repair: Effortless DIY Solutions

Is a bent bike wheel throwing a wrench in your cycling plans? Learn how to effortlessly fix this common issue with our simple DIY solutions. From minor adjustments with a spoke wrench to utilizing the braking pads, weve got you covered to get your wheels back in shape and back on the road in no time!

Cycling is an enjoyable and healthy activity loved by many, but encountering a bent bike wheel can quickly put a damper on your ride. Whether it’s a slight wobble or a more severe bend, addressing this issue promptly is crucial for a smooth and safe cycling experience. While professional help is always an option, there are also simple do-it-yourself solutions to repair a bent bike wheel effortlessly. In this guide, we will explore some DIY methods to straighten a bent bike wheel and get you back on the road in no time.

Understanding the Problem: Identifying a Bent Bike Wheel

Before attempting to repair a bent bike wheel, it’s essential to identify the issue accurately. Signs of a bent wheel include noticeable wobbling while riding, brake pads rubbing against the rim, or an unusual sound coming from the wheel when spinning. Taking the time to pinpoint the problem areas will help determine the best approach for repair.

DIY Solutions for Bent Bike Wheel Repair

Minor Adjustments with a Spoke Wrench

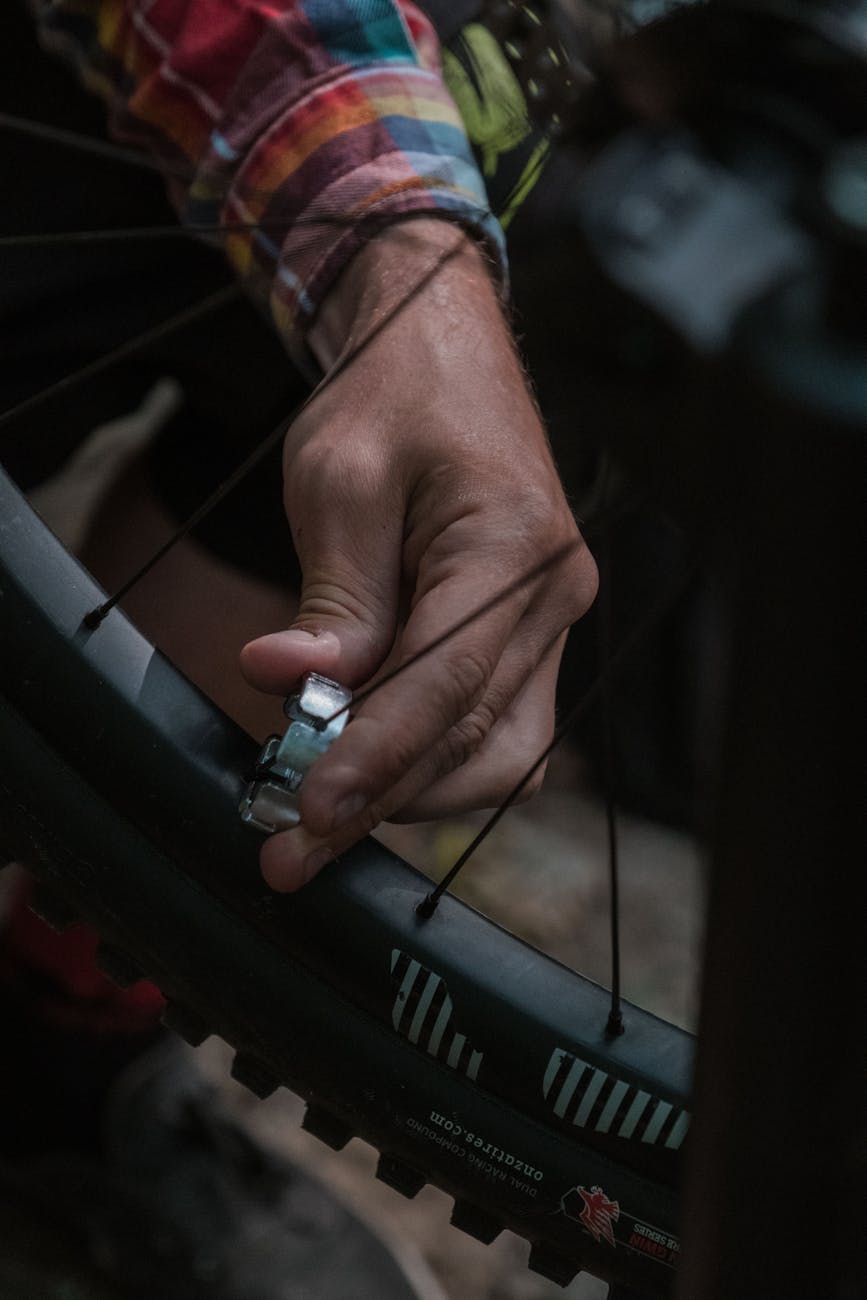
For minor wheel bends, a spoke wrench can be a handy tool for adjusting the tension of individual spokes. Begin by locating the bent section of the wheel and identifying the affected spokes. Use the spoke wrench to tighten or loosen the spokes incrementally, working your way around the wheel to balance the tension. Make small adjustments and regularly check the wheel’s trueness by spinning it to gauge progress.

Utilizing the Braking Pads

In cases where the bend is minimal and primarily affecting one portion of the wheel, utilizing the brake pads can offer a quick fix. Squeeze the brake lever to hold the affected area against the brake pads while spinning the wheel. The friction created against the pads can help straighten out minor bends over time. Remember to release the brake lever periodically to assess the wheel’s progress and prevent overheating.

DIY Truing Stand

Creating a makeshift truing stand can aid in effectively straightening a bent bike wheel. Secure your bike upside down or on a stable stand to allow the wheel to spin freely. Use zip ties or cable ties as makeshift gauges by attaching them to the frame, close to the wheel rim. Observe the distance between the zip ties and the rim as you spin the wheel, adjusting spoke tension accordingly to minimize wobbles and bends.

Safety Precautions and Final Checks

Before embarking on any DIY repairs, ensure your safety by wearing protective gear such as gloves and eye protection. It’s also beneficial to work in a well-lit and spacious area to carry out the repairs efficiently. Once you have straightened the bent bike wheel using the DIY methods outlined, perform a final check by spinning the wheel and observing for any remaining wobbles or irregularities.

Conclusion

Repairing a bent bike wheel doesn’t have to be a daunting task, thanks to these effortless DIY solutions. By understanding the problem, utilizing simple tools like a spoke wrench or brake pads, and incorporating a makeshift truing stand, you can straighten out minor bends and get back to enjoying your cycling adventures. Remember to prioritize safety, take your time with adjustments, and test the wheel thoroughly before hitting the road. With a bit of patience and the right approach, tackling a bent bike wheel can be a satisfying and rewarding endeavor for any cycling enthusiast.

Bike Repairs Made Effortless: Essential Tools for Every Cyclist

Discover the joy of effortless bike repairs with these essential tools for every cyclist. Say goodbye to frustrating breakdowns by equipping yourself with the must-haves like a reliable bike pump and tire levers to handle common issues like flats with ease. Stay ahead of the pack with the right tools in your arsenal for a smooth and stress-free ride every time.

As a cyclist, ensuring your bike is in top-notch condition is essential for a smooth and safe ride. To make bike repairs effortless, having the right tools at your disposal is crucial. Whether you are a beginner or a seasoned rider, having a basic toolkit can save you time and money in the long run. In this article, we will explore the essential tools every cyclist should have to handle common bike repairs with ease.

The Basics: Must-Have Tools

Bike Pump

One of the most critical tools every cyclist should have is a reliable bike pump. Proper tire inflation is vital for a comfortable ride and helps prevent flats. Choose a pump that is compatible with your bike’s valve type, whether it’s a Presta or Schrader valve, to ensure quick and easy inflation.

Tire Levers

Tire levers are essential for removing and installing tires when fixing a flat. These handy tools help you pry the tire off the rim without damaging the tube or tire. Look for durable, lightweight tire levers that can easily fit in your saddlebag or pocket for on-the-go repairs.

Multi-Tool

A multi-tool is a versatile gadget that combines various essential tools in one compact package. From Allen keys and screwdrivers to chain tools and tire levers, a multi-tool can handle a wide range of bike repairs. Invest in a high-quality multi-tool with the right set of functionalities for your bike’s specific components.

Advanced Tools for Deeper Repairs

Chain Breaker Tool

For more advanced repairs like chain maintenance or replacement, a chain breaker tool is a must-have. This tool allows you to remove and install chain pins, adjust chain length, and make quick fixes on the go. Choose a durable and reliable chain breaker that can withstand frequent use.

Cassette Lockring Tool

When it comes to replacing cassettes or making adjustments to your rear gears, a cassette lockring tool is essential. This tool helps you remove and install the cassette lockring with precision, ensuring a smooth gear shifting experience. Make sure to get a compatible tool that fits your cassette type to avoid any issues during repairs.

Essential Maintenance Accessories

Lubricant

Proper lubrication is key to keeping your bike’s moving parts running smoothly. Invest in a high-quality bike-specific lubricant to keep your chain, derailleurs, and other components in top condition. Regularly apply lubricant to prevent wear and reduce friction, extending the lifespan of your bike’s parts.

Cleaning Brushes

Keeping your bike clean is not only aesthetically pleasing but also essential for its performance and longevity. Invest in a set of cleaning brushes designed for bikes to remove dirt, grime, and debris from hard-to-reach areas. Regular cleaning can prevent corrosion and component wear, prolonging the life of your bike.

In conclusion, having the right tools for bike repairs can make a significant difference in your cycling experience. By investing in a basic toolkit that includes must-have tools like a bike pump, tire levers, and a multi-tool, you can handle common repairs with ease. For more advanced repairs, consider adding tools like a chain breaker and cassette lockring tool to your arsenal. Coupled with essential maintenance accessories like lubricant and cleaning brushes, you can keep your bike in top shape and enjoy many more miles of hassle-free riding.

Repair Squeaky Bike Brakes: Effortless Fix Guide

Is the irritating squeaking of your bike brakes putting a damper on your ride? Discover how to effortlessly silence those squeaky bike brakes with our step-by-step guide. Keeping your brakes in tiptop shape has never been easier!

How to Repair Squeaky Bike Brakes: An Effortless Fix Guide

Are your bike brakes making an annoying squeaking sound whenever you ride? Don’t worry; fixing squeaky bike brakes is a common issue that can be easily resolved with a few simple steps. In this guide, we will walk you through the process of diagnosing and repairing squeaky bike brakes so that you can enjoy a smooth and silent ride every time.

Identifying the Cause of Squeaky Brakes

The first step in repairing squeaky bike brakes is to identify the root cause of the noise. Squeaking brakes can be caused by a variety of factors, including dirty or worn brake pads, misaligned brake calipers, or contaminated braking surfaces. By carefully examining your bike’s brake system, you can determine the specific cause of the squeaking noise and proceed with the appropriate solution.

Cleaning and Inspecting Brake Pads

One common cause of squeaky bike brakes is dirty or contaminated brake pads. To fix this issue, start by removing the wheel from the bike and inspecting the brake pads for dirt, debris, or wear. If the brake pads appear dirty, gently clean them with a soft bristle brush and rubbing alcohol. Ensure that the brake pads are free of any residue that may be causing the squeaking noise.

Adjusting Brake Calipers

Misaligned brake calipers can also contribute to squeaky bike brakes. To realign the brake calipers, loosen the mounting bolts that secure the calipers to the frame or fork. Carefully adjust the position of the calipers so that they align with the braking surface of the wheel. Once the calipers are properly aligned, tighten the mounting bolts to secure them in place. This simple adjustment can help eliminate the squeaking noise and improve the performance of your bike brakes.

Replacing Worn Brake Pads

If cleaning and adjusting the brake pads do not resolve the squeaking issue, it may be time to replace the brake pads altogether. Over time, brake pads can wear down and lose their effectiveness, leading to squeaking brakes and reduced stopping power. To replace the brake pads, remove the old pads from the calipers and install new ones according to the manufacturer’s instructions. Be sure to choose brake pads that are compatible with your bike’s braking system for optimal performance.

Maintaining Proper Brake Care

Once you have successfully repaired your squeaky bike brakes, it is essential to maintain proper care to prevent future issues. Regularly inspect your brake pads for wear and contamination, clean your braking surfaces, and perform routine maintenance to ensure that your brakes are functioning correctly. By staying proactive with your brake care, you can enjoy a quiet and reliable braking system on your bike.

Conclusion

Repairing squeaky bike brakes is a simple and straightforward process that can improve your riding experience and safety. By identifying the cause of the squeaking noise, cleaning and adjusting brake components, and maintaining proper care, you can eliminate annoying brake squeaks and enjoy smooth, silent braking on your bike. Follow the steps outlined in this guide to address squeaky bike brakes effortlessly and get back to riding with confidence.

Bike Chain Problems: Easy Fixes and Expert Tips

Is your cycling experience being hindered by pesky **bike chain problems**? From chain slippage to rust, weve got you covered with easy fixes and expert tips to keep your chain in top condition for a seamless ride every time.

Cycling enthusiasts know that maintaining a bike’s chain is crucial for smooth and efficient riding. However, even with the best care, bike chain problems can still arise, causing frustration and hindering your cycling experience. In this article, we will delve into common bike chain issues, easy fixes, and expert tips to keep your chain in top condition and ensure a seamless ride every time.

Common Bike Chain Problems

1. Chain Slippage: One of the most common issues cyclists face is chain slippage, where the chain skips over the cogs or chainrings while pedaling. This could be due to a worn chain, improperly adjusted derailleurs, or a dirty chain.

2. Chain Rust: Exposing your bike chain to moisture and humidity can lead to rust formation over time. Rust not only affects the chain’s performance but also shortens its lifespan.

3. Chain Stretch: Continuous use and lack of proper lubrication can cause the chain to stretch. A stretched chain not only affects the shifting performance but can also wear down the cassette and chainrings faster.

Easy Fixes for Bike Chain Problems

Adjusting the Chain Tension

If you notice chain slippage or hear unusual noises while pedaling, it may be time to check your chain tension. A loose chain can lead to various issues, so make sure to adjust the tension to the manufacturer’s recommended specifications.

Cleaning and Lubricating the Chain

Regularly cleaning and lubricating your bike chain is essential for its longevity and performance. Use a degreaser to remove dirt and grime, then apply a high-quality chain lubricant to ensure smooth operation.

Replacing a Worn Chain

If your chain is excessively worn or stretched, it’s time to replace it. A worn chain can cause damage to other components of your bike and compromise your riding experience. Consult your local bike shop for assistance and choose a high-quality chain for optimal performance.

Expert Tips for Maintaining Your Bike Chain

1. Regular Inspections: Make it a habit to inspect your bike chain for wear and tear regularly. Look out for signs of rust, stretching, or misalignment, and address any issues promptly.

2. Proper Lubrication: Use a lubricant specifically designed for bike chains and apply it sparingly. Over-lubrication can attract dirt and debris, leading to faster wear and potential chain problems.

3. Professional Tune-Ups: Schedule regular maintenance checks with a professional bike mechanic to ensure that your chain and other components are in top condition. A professional tune-up can prolong the life of your bike and prevent costly repairs in the long run.

In conclusion, bike chain problems are common among cyclists but can be easily managed with the right knowledge and maintenance routines. By addressing issues promptly, performing regular maintenance, and following expert tips, you can enjoy a smooth and seamless riding experience every time. Remember, a well-maintained chain not only enhances performance but also prolongs the life of your beloved bike.

Flat Tire Fixing: Ultimate DIY Guide for Effortless Repair

Dont let a flat tire deflate your day! Learn how to effortlessly fix a flat tire with our ultimate DIY guide. Save time, money, and stress by mastering the art of flat tire fix and hit the road with confidence.

Flat Tire Fixing: Ultimate DIY Guide for Effortless Repair

Flat tires are a common inconvenience that many drivers face at some point. Knowing how to fix a flat tire on your own can save you time, money, and the hassle of waiting for roadside assistance. In this ultimate DIY guide, we will walk you through the step-by-step process of fixing a flat tire with ease.

Preparation is Key

Before you begin fixing a flat tire, make sure you have all the necessary tools and supplies on hand. You will need a spare tire, jack, lug wrench, and a flashlight if you are working in low light conditions. It’s also a good idea to have a pair of gloves to protect your hands while handling dirty or greasy parts.

Locate the Flat Tire

The first step is to locate the flat tire on your vehicle. If you are unsure which tire is flat, you can walk around the car and visually inspect each tire. Look for any signs of damage or obvious deflation. Once you have identified the flat tire, park your car on a flat, stable surface and engage the parking brake.

Jack up the Vehicle

Use the jack to lift the car off the ground, ensuring it is securely positioned under the designated jacking point. Consult your vehicle’s manual for the correct jacking points to avoid damaging the car. Once the car is lifted, use the lug wrench to loosen the lug nuts on the flat tire but do not remove them completely yet.

Remove the Flat Tire

Once the lug nuts are loosened, it’s time to remove the flat tire from the vehicle. Carefully take off the lug nuts and set them aside in a safe place. Slowly pull the flat tire towards you until it is completely free from the hub. Be cautious as the tire can be heavy and might require some effort to remove.

Replace with the Spare Tire

Now that the flat tire is removed, it’s time to replace it with the spare tire. Align the spare tire with the hub and carefully slide it onto the wheel studs. Once the spare tire is in place, hand tighten the lug nuts to secure the tire to the hub. Make sure the tire is positioned correctly before lowering the vehicle back to the ground using the jack.

Secure the Lug Nuts

Once the car is on the ground, use the lug wrench to tighten the lug nuts in a star pattern to ensure even tightening. Be sure to tighten the lug nuts securely but avoid over-tightening them, as this could cause damage to the wheel or studs.

Lower the Vehicle and Finish Up

After securing the lug nuts, lower the vehicle completely to the ground using the jack. Once the car is safely on the ground, remove the jack and stow it away. Double-check that all the lug nuts are tight and the spare tire is securely in place before driving your car.

In conclusion, knowing how to fix a flat tire is a valuable skill that every driver should possess. By following this ultimate DIY guide, you can easily repair a flat tire and get back on the road in no time. Remember to drive cautiously on the spare tire and replace it with a new tire as soon as possible. With a little preparation and the right tools, fixing a flat tire can be a straightforward and empowering experience.