Beginner-Friendly Bike Repair Hacks | Effortless Tips for Budget-conscious Cyclists

Whether youre a casual rider or a seasoned cyclist, these beginner-friendly bike maintenance tips will make keeping your bike in top shape a breeze. From essential tools to proper tire maintenance and learning basic brake adjustments, these effortless hacks are perfect for budget-conscious cyclists looking to enjoy a smoother ride. So, grab your bike multi-tool and get ready to roll with confidence!

Cycling is a fantastic way to stay active, explore the outdoors, and promote a healthy lifestyle. However, maintaining your bike can sometimes feel daunting, especially if you’re on a budget. Fortunately, there are several beginner-friendly bike repair hacks that can help you keep your bike in top shape without breaking the bank. Whether you’re a casual rider or a seasoned cyclist, these effortless tips will make maintenance more manageable and enjoyable.

1. Essential Tools Every Cyclist Needs
Before diving into bike repair, it’s crucial to have the right tools. While professional bike repair kits can be expensive, you can start with some basic essentials that won’t cost a fortune. Invest in a quality bike multi-tool, tire levers, a pump, and chain lubricant. These tools will come in handy for most basic repairs and maintenance tasks.

2. Keep Your Bike Clean
Regular cleaning is essential for bike maintenance. Use a gentle bike-specific cleaner or mild soap and water to clean the frame, wheels, and drivetrain. A clean bike not only looks better but also performs better. Remember to avoid using high-pressure water, as it can damage sensitive components.

3. Check and Inflate Your Tires
Proper tire maintenance is key to a smooth and safe ride. Check your tire pressure regularly using a gauge and ensure they are inflated to the recommended PSI (pounds per square inch) as indicated on the sidewall of the tire. Underinflated tires can lead to increased rolling resistance and more frequent punctures.

4. Learn Basic Brake Adjustments
Brakes are a crucial safety feature on your bike, so it’s essential to keep them in good working condition. Learn how to adjust your brake pads so that they are aligned properly with the rim. Additionally, check the brake cables for signs of wear and replace them if necessary. Properly functioning brakes can prevent accidents and ensure a safe ride.

5. Master the Art of Chain Maintenance
A well-lubricated chain is essential for smooth shifting and efficient pedaling. Keep your chain clean by regularly wiping off dirt and grime with a rag. Apply a bicycle-specific chain lubricant and wipe off any excess to prevent attracting more dirt. A well-maintained chain will extend the life of your drivetrain components and improve overall performance.

6. Tighten Loose Bolts
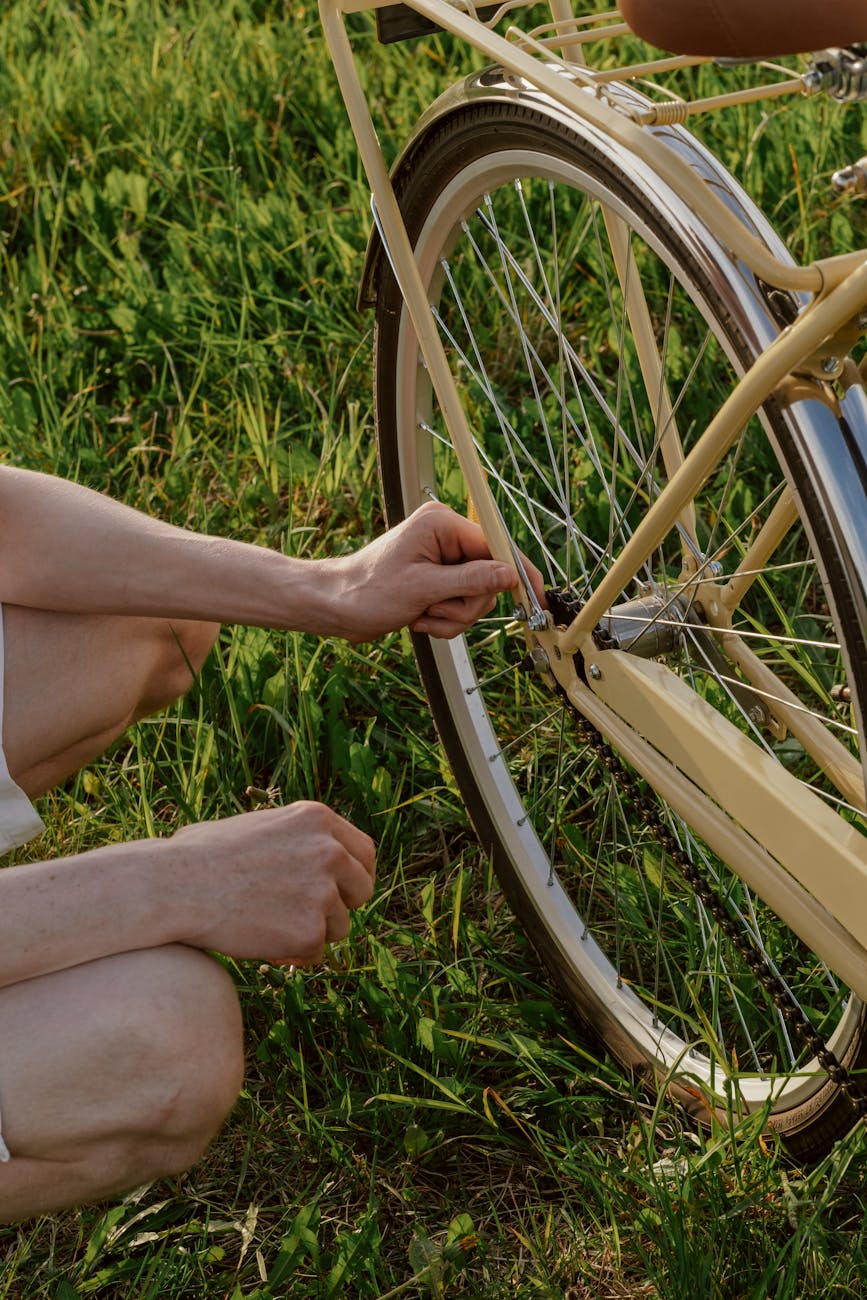
Regularly check all the bolts on your bike, including those on the stem, handlebars, seat post, and pedals. Loose bolts can lead to unwanted creaking noises and compromise the structural integrity of your bike. Use a torque wrench to ensure that bolts are tightened to the manufacturer’s specifications.

7. Learn How to Fix a Flat Tire
Flat tires are a common occurrence for cyclists, but they don’t have to ruin your ride. Learn how to fix a flat tire by carrying a spare tube, tire levers, and a pump with you on every ride. Practice changing a tube at home so you’ll be prepared when you encounter a flat on the road.

By following these beginner-friendly bike repair hacks, you can save money on professional repairs and keep your bike in excellent condition. Remember that regular maintenance is the key to a long-lasting and enjoyable riding experience. With a little bit of effort and know-how, you can become a self-sufficient cyclist and tackle basic repairs with confidence. Happy riding!

Hydraulic Bike Brakes: Ultimate Guide for Effortless Fixing

Unleash the power of hydraulic bike brakes with our ultimate guide for effortless fixing. From understanding how these brakes work to tackling common issues, this comprehensive resource has got you covered on all things hydraulic bike brakes.

Hydraulic Bike Brakes: The Ultimate Guide for Effortless Fixing

Hydraulic bike brakes have revolutionized the cycling experience, providing superior stopping power and modulation compared to traditional cable-actuated brakes. Whether you’re a seasoned cyclist or just starting out, understanding how hydraulic brakes work and knowing how to fix common issues can greatly enhance your riding performance and safety. In this comprehensive guide, we will delve into the intricacies of hydraulic bike brakes, explore troubleshooting tips, and walk you through the steps to effortlessly fix common brake problems.

Understanding Hydraulic Bike Brakes

Hydraulic bike brakes operate on the principle of transferring force through a fluid-filled system to actuate the brake calipers. When you squeeze the brake lever, hydraulic fluid is pushed through the brake hoses, exerting pressure on the calipers and causing the brake pads to clamp onto the rotor, effectively slowing down the bike. This system offers several advantages, including better modulation, consistent braking performance, and minimal maintenance requirements.

Identifying Common Brake Issues

While hydraulic brakes are known for their reliability, they can sometimes encounter issues that affect their performance. One of the most common problems is air contamination in the brake system, which can lead to a spongy feel or a loss of braking power. Other issues may include brake pad wear, fluid leakage, or rotor misalignment. By learning to recognize these issues early on, you can address them promptly and ensure your brakes are in top condition.

Effortless Fixing Tips

Fixing hydraulic bike brakes may seem daunting at first, but with the right tools and knowledge, you can troubleshoot and resolve most issues with ease. Here are some tips to help you fix common brake problems effortlessly:

1. Bleeding the Brakes: Over time, air may accumulate in the brake system, compromising its performance. Bleeding the brakes involves purging the air from the system by replacing it with fresh hydraulic fluid. This process helps restore the braking feel and responsiveness.

2. Brake Pad Replacement: Worn brake pads can diminish braking performance and increase stopping distances. To replace the brake pads, remove the retaining pin or bolt, slide out the old pads, and install the new ones in their place. Be sure to follow the manufacturer’s guidelines for pad alignment and bedding-in procedures.

3. Rotor Alignment: A misaligned rotor can cause brake squealing and vibration during braking. To realign the rotor, loosen the caliper mounting bolts, align the rotor between the brake pads, and tighten the bolts evenly to secure the caliper in place.

By following these steps and maintaining your hydraulic bike brakes regularly, you can ensure optimal performance and safety on your rides. Remember to consult your bike manufacturer’s manual and seek professional assistance if you encounter complex brake issues that require expert attention.

Conclusion

Hydraulic bike brakes offer unparalleled stopping power and precision, making them a popular choice among cyclists who demand top-notch performance. By understanding how hydraulic brakes work, recognizing common issues, and learning how to fix them effortlessly, you can enjoy a smooth and safe riding experience. Remember to prioritize brake maintenance and be proactive in addressing any concerns to keep your hydraulic brakes in prime condition. With the tips outlined in this guide, you’ll be well-equipped to tackle brake problems and get back on the road with confidence.

Fix Your Bike Rack Woes with Our Expert Repairs

Say goodbye to your bike rack struggles for good with our expert repairs! From rusty components to loose mounting hardware, weve got you covered in fixing those pesky bike rack issues once and for all. Lets hit the road worry-free!

Title: The Ultimate Guide to Fixing Bike Rack Issues Like a Pro

Introduction:

Are you tired of struggling with your bike rack every time you try to hit the road? Bike rack issues can be frustrating and inconvenient, but fear not – our expert repairs will help you fix your bike rack problems once and for all.

Common Bike Rack Problems:

1. Rusty Components

Rusty components on your bike rack can not only be unsightly but also compromise the rack’s structural integrity. To fix this issue, start by cleaning the affected areas with a rust remover. Once the rust is removed, apply a rust-resistant coating to protect the components from future corrosion.

2. Loose Mounting Hardware

Loose mounting hardware can lead to a wobbly bike rack that poses a safety risk. Check all the bolts and screws holding the rack in place and tighten them as needed. If any hardware is damaged or missing, replace it with high-quality parts to ensure a secure fit.

3. Damaged Straps or Buckles

If your bike rack uses straps or buckles to secure the bikes in place, damaged or worn-out straps can be a major issue. Inspect the straps regularly and replace them if they show signs of wear and tear. Ensure that the buckles are in good working condition and can securely hold the bikes without slipping.

Expert Repair Tips:

1. Lubricate Moving Parts

To prevent squeaking and ensure smooth operation, lubricate the moving parts of your bike rack regularly. Use a silicone or a Teflon-based lubricant to keep the mechanisms running smoothly and prevent rust from developing in the hinges and joints.

2. Adjust Alignment

Improper alignment can cause the bikes to sway during transportation and increase the risk of damage. Make sure your bike rack is properly aligned with your vehicle to maintain stability while driving. Adjust the angle and position of the rack to distribute the weight evenly and minimize any swaying or bouncing.

3. Test the Rack

After performing repairs or maintenance on your bike rack, always test it before hitting the road. Load your bikes onto the rack and drive around to check for any unusual noises, movements, or vibrations. Taking the time to test your rack will ensure that it is safe and secure for your next adventure.

Conclusion:

By following these expert repair tips, you can easily fix your bike rack issues and enjoy hassle-free transportation of your bikes. Remember to inspect your bike rack regularly, perform necessary maintenance, and address any problems promptly to keep your rack in top condition. With our expert guidance, you’ll be back on the road in no time, ready for your next cycling adventure.

Off-Roaders’ Essential Trailside Bike Repair Guide

Navigating rugged off-road trails can lead to thrilling adventures, but when mechanical mishaps strike, having the know-how for trailside bike repair is key. From fixing a flat tire to tackling chain woes, arming yourself with essential tips and tools ensures your ride stays smooth and uninterrupted. Dive into our ultimate Off-Roaders Essential Trailside Bike Repair Guide and be ready to conquer any maintenance challenge that comes your way!

Title: Ultimate Off-Roaders’ Essential Trailside Bike Repair Guide

Off-roading on rugged trails can be an exhilarating adventure, but it also comes with its share of challenges. From unexpected mechanical issues to flat tires, being prepared for emergencies can make all the difference in ensuring an enjoyable ride. In this comprehensive trailside bike repair guide, we will cover essential tips and tools to keep you rolling on the trails.

Assessing the Situation: Diagnosing Bike Problems

When you encounter a mechanical issue on the trail, the first step is to assess the situation. Start by identifying the problem area – whether it’s a flat tire, chain issues, or brake problems. Having a basic understanding of your bike’s components and how they function can help pinpoint the cause of the problem.

Flat Tire Fixes: Patching and Inflating

One of the most common issues off-roaders face is a flat tire. To address this problem, you’ll need a tire patch kit, tire levers, and a portable pump. Start by removing the wheel, using the tire levers to take off the tire, and locating the puncture. Patch the inner tube, reassemble the tire, and inflate it to the recommended pressure. Practice this at home before hitting the trails so you can confidently handle it in an emergency situation.

Chain Maintenance: Chain Tool and Lubrication

A broken chain can quickly derail your off-road adventure. Carry a chain tool in your repair kit to address any chain-related issues. If your chain breaks, use the chain tool to push out the damaged link and reattach the chain. Regularly lubricating your chain before rides can prevent excess wear and tear, so remember to pack chain lubricant for maintenance on the go.

Brake Adjustments: Brake Tool and Pad Replacement

Properly functioning brakes are crucial for safety on the trails. Check your brake pads for wear before each ride and replace them when needed. Pack a brake tool to adjust the brake pads and make sure they are aligned correctly. In case of brake problems while riding, having spare brake pads in your repair kit can save the day.

Emergency Supplies: Multi-Tool and First Aid Kit

In addition to specific bike repair tools, it’s essential to carry a multi-tool with various wrench sizes, screwdrivers, and a chain breaker. A well-equipped first aid kit should also be a part of your trailside repair kit in case of injuries. These emergency supplies can help you address a wide range of bike issues and attend to any minor injuries sustained on the trail.

Know Your Limits: When to Call for Help

While being self-sufficient on the trail is essential, it’s equally important to know your limits. If you encounter a severe mechanical issue that you can’t fix with the tools at hand or if you’re injured and unable to ride safely, don’t hesitate to call for help. Carry a charged phone or a communication device for emergencies and always inform someone of your off-road riding plans.

Conclusion

Off-roaders’ essential trailside bike repair guide equips you with the knowledge and tools to handle common bike issues while exploring rugged terrain. By being prepared and knowing how to address mechanical problems on the trail, you can make the most of your off-road adventures with confidence and peace of mind. Remember to practice these repair techniques at home to enhance your skills and be ready for any challenges that come your way on the trails.

Fix Noisy Bike Bottom Bracket with Effortless Solution

Is your bikes bottom bracket causing ruckus on your ride? Say goodbye to those annoying creaks and clunks with our effortless solution to fix a noisy bike bottom bracket. Enjoy a smooth, quiet cycling experience once again!

Subheading (H2): Understanding the Issue of a Noisy Bike Bottom Bracket

Subheading (H2): Effortless Solutions to Fix a Noisy Bike Bottom Bracket

Subheading (H3): Regular Maintenance Tips to Prevent Noisy Bike Bottom Bracket

Cycling enthusiasts know the frustration that comes with a noisy bike bottom bracket. Whether you’re a casual rider or a dedicated cyclist, dealing with a clunky, creaking bike can put a damper on your riding experience. The bottom bracket is a crucial component of your bike that connects the crankset to the frame, allowing for smooth pedaling motion. When this part starts making noise, it can be a sign of wear and tear or lack of proper maintenance. In this article, we will explore the common causes of a noisy bike bottom bracket and provide you with effortless solutions to fix the issue.

Understanding the Issue of a Noisy Bike Bottom Bracket

A noisy bike bottom bracket can be caused by various factors, such as dirt and grime buildup, worn-out bearings, or improper installation. The first step in resolving the issue is to identify the source of the noise. If your bike is making a clicking, creaking, or grinding sound while pedaling, chances are it’s coming from the bottom bracket area. Ignoring the noise can lead to further damage to your bike’s components and affect your riding performance.

Effortless Solutions to Fix a Noisy Bike Bottom Bracket

One of the most straightforward solutions to fix a noisy bike bottom bracket is to clean and lubricate the component. Start by removing the crankset to access the bottom bracket. Wipe away any dirt or debris that may have accumulated around the bottom bracket shell. Inspect the bearings for signs of wear or damage and replace them if necessary. Apply a generous amount of grease to the bearings and reassemble the crankset.

If cleaning and lubricating the bottom bracket does not resolve the noise issue, it may be time to replace the bearings or the entire bottom bracket assembly. Consult your local bike shop or a professional mechanic for assistance in choosing the right replacement parts. Investing in high-quality bearings and components will ensure a smoother and quieter ride.

Regular Maintenance Tips to Prevent Noisy Bike Bottom Bracket

To prevent future occurrences of a noisy bike bottom bracket, it’s essential to incorporate regular maintenance into your biking routine. Here are some tips to help keep your bottom bracket in top condition:

1. Clean your bike regularly to remove dirt and grime buildup.
2. Check the bottom bracket for signs of wear or damage periodically.
3. Replace worn-out bearings as soon as you notice any noise or play.
4. Avoid over-tightening the bottom bracket during installation.
5. Use quality lubricants to keep the bearings running smoothly.

By following these maintenance tips and addressing any noise issues promptly, you can enjoy a quieter and more enjoyable riding experience. Remember that taking care of your bike’s components will not only prolong their lifespan but also enhance your overall cycling performance.

In conclusion, a noisy bike bottom bracket is a common issue that can be easily resolved with the right knowledge and tools. By understanding the causes of the noise, implementing effortless solutions, and practicing regular maintenance, you can keep your bottom bracket in optimal condition and enjoy a smoother, quieter ride. Don’t let a noisy bike bottom bracket hold you back from exploring new cycling adventures—take action today and get back on the road with confidence.

Cracked Bike Pedals Repair: Must-Have Step-by-Step Guide

Are you tired of dealing with cracked bike pedals interrupting your cycling adventures? Say goodbye to the frustration! Our must-have step-by-step guide on repairing cracked bike pedals will have you back on the road in no time. Master the art of fixing those cracks, and get ready for a smoother ride ahead!

Cycling enthusiasts know the frustration of dealing with cracked bike pedals. However, instead of letting this issue derail your ride, learning how to repair cracked bike pedals can save you time and money. This must-have step-by-step guide will walk you through the process of repairing cracked bike pedals, ensuring you get back on the road quickly and safely.

Identifying the Issue

Before you can start repairing your cracked bike pedals, you need to identify the extent of the damage. Cracks in bike pedals can occur due to excessive wear and tear, impacts, or even manufacturing defects. Begin by closely inspecting the pedal for any visible cracks or damage. Use a flashlight to check for hairline cracks that may not be immediately noticeable.

Tools and Materials Needed

To repair cracked bike pedals, you will need a few essential tools and materials. These include:

– Allen key or wrench
– Epoxy adhesive
– Sandpaper
– Clean rag
– Protective gloves
– Safety goggles

Ensure you have all these items on hand before you start the repair process.

Step-by-Step Repair Guide

Step 1: Remove the Pedal

Start by removing the pedal from the bike using the appropriate tool. Most bike pedals can be easily unscrewed using an Allen key or wrench. Once the pedal is detached, clean it thoroughly with a clean rag to remove any dirt or debris.

Step 2: Sand the Cracked Area

Use sandpaper to gently sand the cracked area of the pedal. This step helps create a rough surface for better adhesion of the epoxy adhesive later on. Be careful not to sand too aggressively, as you don’t want to further damage the pedal.

Step 3: Apply Epoxy Adhesive

Next, apply a generous amount of epoxy adhesive to the cracked area of the pedal. Make sure to spread the adhesive evenly and cover the entire crack. Epoxy adhesive is known for its strength and durability, making it ideal for repairing bike pedals.

Step 4: Clamp and Let Dry

Once you have applied the epoxy adhesive, gently clamp the cracked area together to ensure a tight bond. Allow the adhesive to dry completely as per the manufacturer’s instructions. This usually takes a few hours, so be patient and avoid using the pedal until the adhesive has fully cured.

Step 5: Reattach the Pedal

After the epoxy adhesive has dried and cured, reattach the pedal to your bike using the Allen key or wrench. Make sure it is securely fastened to avoid any issues while riding.

Final Checks and Maintenance

Before hitting the road, give your repaired bike pedal a final inspection to ensure the repair holds up. Test the pedal by applying some pressure to check for any signs of weakness. Additionally, consider applying a protective coating to the pedal to prevent future damage and extend its lifespan.

In conclusion, understanding how to repair cracked bike pedals is a valuable skill for any cyclist. By following this step-by-step guide and being prepared with the right tools and materials, you can quickly and effectively fix cracked pedals, allowing you to enjoy your rides without interruption. Take care of your bike pedals, and they will take care of you on your cycling adventures.

Bike Handlebar Tape Replacement Made Easy

Ready to give your bike a fresh new look and feel? Replacing your bike handlebar tape is a simple and cost-effective way to upgrade your ride. Dive into this step-by-step guide to bike handlebar tape replacement and transform the aesthetics and comfort of your cycling experience effortlessly.

Bike Handlebar Tape Replacement Made Easy

Are you looking to give your bike a fresh new look and feel? One simple and cost-effective way to upgrade your ride is by replacing the handlebar tape. This quick and easy maintenance task can make a world of difference in both the aesthetics and comfort of your bike. In this article, we will guide you through the process of replacing your bike handlebar tape step by step, making it a breeze for even beginners to accomplish.

Choosing the Right Tape
Before you start the replacement process, you’ll need to choose the right handlebar tape for your bike. Handlebar tapes come in various materials, colors, and textures, so make sure to select one that suits your preferences and riding style. Cork, foam, and gel tapes are some popular options, each offering different levels of cushioning and grip. Consider factors like durability, sweat absorption, and how the tape feels in your hands when making your selection.

Preparing the Handlebars
To begin the replacement process, start by removing the old tape from your handlebars. Carefully unwrap the existing tape, taking care not to damage the handlebar surface. Once the old tape is removed, clean the handlebars thoroughly to ensure a smooth and residue-free surface for the new tape. You can use a clean rag with rubbing alcohol to wipe down the handlebars and remove any dirt or sticky residue.

Applying the New Tape
Now comes the fun part – applying the new handlebar tape. Start at one end of the handlebar and secure the tape with the adhesive backing provided. Wrap the tape tightly around the handlebars, overlapping each wrap slightly to ensure full coverage. Make sure to keep the tape taut as you go to prevent any wrinkles or slack. As you reach the end of the handlebar, cut the tape to size and secure it in place with the finishing tape or plugs included in the package.

Finishing Touches
Once the new tape is securely in place, take a moment to smooth out any wrinkles or imperfections in the tape. You can also adjust the tape’s position slightly to ensure a uniform appearance along the length of the handlebars. Finally, check that the end caps or plugs are securely in place to prevent the tape from unraveling during your rides.

Benefits of Handlebar Tape Replacement
Replacing your bike’s handlebar tape not only enhances the bike’s appearance but also improves your riding experience. Fresh handlebar tape provides better grip and cushioning, reducing hand fatigue and improving comfort on long rides. Additionally, a well-maintained handlebar tape can enhance the overall durability of your bike’s handlebars by protecting them from moisture and wear.

In conclusion, replacing your bike handlebar tape is a simple yet rewarding task that can give your bike a new lease on life. By following the steps outlined in this article, you can easily transform the look and feel of your bike with minimal effort and cost. So why wait? Grab a new roll of handlebar tape and get ready to enjoy a smoother and more stylish ride on your bike.

Gear Up: Essential Derailleur Fixes for Effortless Gear Changes

Ready to breeze through gear changes on your bike? Say goodbye to chain skipping and gear slipping with these essential **derailleur fixes**! Keep the ride smooth and the gears shifting seamlessly with simple adjustments for optimum performance.

Essential Derailleur Fixes for Effortless Gear Changes

The bicycle derailleur is a vital component of your bike’s drivetrain system that enables you to effortlessly shift gears, providing a smooth and efficient riding experience. However, like all mechanical parts, derailleurs can sometimes malfunction or fall out of adjustment, leading to issues such as chain skipping, gear slipping, or difficulty shifting gears. In this article, we will explore some essential derailleur fixes that can help you maintain optimal performance and ensure seamless gear changes on your bike.

Understanding How Your Derailleur Works

Before delving into derailleur fixes, it is essential to have a basic understanding of how this crucial component functions. The derailleur is responsible for moving the chain from one sprocket to another on the cassette or chainrings, allowing you to change gears. When you shift gears using the shifter on your handlebar, the derailleur moves laterally to guide the chain onto the desired gear. Proper adjustment and maintenance of the derailleur are essential for precise and smooth gear changes.

Common Derailleur Issues and Fixes

1. Chain Skipping: Chain skipping occurs when the chain jumps over the teeth of the sprockets, resulting in an uneven and unreliable ride. This issue is often caused by a stretched chain or worn-out cassette. To fix chain skipping, inspect the chain for wear and replace it if necessary. Additionally, check the teeth of the cassette for signs of wear and replace it if excessively worn.

2. Indexing Adjustment: Proper gear shifting relies on accurate indexing adjustment, which ensures that the derailleur moves the chain to the correct position on the sprockets. If you experience difficulty shifting gears or hear grinding noises, your indexing may be off. To adjust the indexing, use the barrel adjuster on the derailleur or shifter to fine-tune the alignment of the chain with the sprockets.

3. Cable Tension: The cable tension plays a crucial role in the smooth operation of the derailleur. If the cable is too loose or too tight, it can lead to imprecise shifting and poor performance. To fix cable tension issues, adjust the tension using the barrel adjuster at the derailleur or shifter. Ensure that the cable is securely fastened and free of fraying or kinks.

4. Limit Screws: The high and low limit screws on the derailleur control the range of motion of the derailleur, preventing the chain from shifting off the sprockets. If your chain falls off the cassette or chainrings, adjust the limit screws to limit the movement of the derailleur towards the outer and inner edges of the gears.

Regular Maintenance Tips

In addition to addressing specific derailleur issues, regular maintenance is key to ensuring optimal performance and longevity of your derailleur. Here are some maintenance tips to keep your derailleur in top shape:

– Clean the derailleur regularly to remove dirt, debris, and grease buildup.
– Lubricate the moving parts of the derailleur to reduce friction and ensure smooth operation.
– Check the alignment of the derailleur hanger and realign if it is bent or misaligned.

By following these essential derailleur fixes and maintenance tips, you can enjoy a seamless and hassle-free gear-changing experience on your bike. Remember to inspect your derailleur regularly and address any issues promptly to keep your bike running smoothly.

Visibility and Safety Guaranteed: Effortless Bike Lights Repair

Is your bike light flickering or completely out? Dont let a malfunctioning bike light dim your ride – keep your visibility and safety in check with these easy bike lights repair tips. Whether its dead batteries, loose connections, or damaged wiring, weve got you covered on getting your lights shining bright again in no time! Cycling just got safer and more enjoyable with effortless bike lights repair.

Cycling enthusiasts know the importance of visibility and safety when riding their bikes, especially during low-light conditions. One crucial element in ensuring visibility on the road is having properly functioning bike lights. These lights not only illuminate the cyclist’s path but also make them more visible to other road users, reducing the risk of accidents. However, bike lights can sometimes malfunction or require repair, which can be a hassle for riders. In this article, we will provide you with some tips and tricks for effortless bike lights repair, ensuring that your rides are both safe and enjoyable.

Understanding the Components of Bike Lights

Before attempting any repairs on your bike lights, it’s essential to understand the different components that make up the lighting system. Bike lights typically consist of a front light, rear light, and sometimes additional side lights for enhanced visibility. The front light is usually white and is mounted on the handlebars, while the rear light is red and is mounted on the seat post or rear rack. Familiarize yourself with how these components are connected and powered to facilitate the repair process.

Troubleshooting Common Issues

When your bike lights aren’t working correctly, the first step is to troubleshoot the problem. Common issues that cyclists face with their bike lights include dead batteries, loose connections, or damaged wiring. Start by checking the batteries in your lights and replacing them if necessary. Make sure all connections are secure and free of debris, as dirt or corrosion can affect performance. If you notice any visible damage to the wiring or casing of the lights, it may be time for some repairs.

DIY Repairs for Bike Lights

For minor issues such as loose connections or broken mounts, you can often perform DIY repairs at home with just a few basic tools. Use a screwdriver to tighten any loose screws or connections and ensure that the lights are securely attached to your bike. If you need to replace a bulb in your bike light, make sure to use the correct type and wattage to avoid damaging the light further. Additionally, you can use electrical tape to secure any exposed wires and prevent them from short-circuiting.

Seeking Professional Help

If you encounter more complex issues with your bike lights that you cannot resolve on your own, it may be time to seek professional help. Local bike shops or repair centers often offer services for fixing bike lights and can diagnose and repair the problem efficiently. Professional technicians have the expertise and tools necessary to handle intricate repairs and ensure that your bike lights are in optimal working condition.

Regular Maintenance for Long-Term Performance

To prevent frequent breakdowns and ensure the long-term performance of your bike lights, regular maintenance is essential. Clean your lights periodically to remove dirt and grime that can obstruct the brightness of the bulbs. Check the batteries regularly and replace them as needed to avoid sudden failures during your rides. Additionally, inspect the wiring and connections for any signs of wear or damage, addressing problems promptly to prevent further issues.

In conclusion, having functioning bike lights is crucial for your safety and visibility on the road, especially during dawn, dusk, or nighttime rides. By understanding the components of your bike lights, troubleshooting common issues, performing DIY repairs when possible, seeking professional help when needed, and maintaining your lights regularly, you can ensure that your bike lights are always in top condition. Remember, a well-lit bike is a safe bike, so don’t overlook the importance of proper bike lights repair for a smooth and secure cycling experience.

Repair Punctured Inner Tubes Effortlessly with Our Proven Method

Repairing punctured inner tubes doesnt have to be a hassle anymore! Learn how to effortlessly patch up those annoying punctures and get back on your bike in no time with our proven method for repairing punctured inner tubes. Say goodbye to unexpected flats and keep rolling smoothly with our expert tips on how to repair punctured inner tubes.

Whether you enjoy cycling for exercise, commuting, or leisure, dealing with a punctured inner tube can be frustrating. A flat tire can quickly derail your plans and leave you feeling stranded. However, with the right knowledge and tools, repairing a punctured inner tube can be a straightforward process. In this article, we will share a proven method for repairing punctured inner tubes effortlessly. By following these steps, you can get back on the road in no time.

Understanding the Problem: Identifying a Punctured Inner Tube

Before you can repair a punctured inner tube, you must first identify the problem. A punctured inner tube is typically caused by sharp objects such as glass, nails, or thorns penetrating the tire and causing a leak. You may notice a sudden loss of air pressure or hear a hissing sound when a puncture occurs. To locate the punctured area, you can submerge the inflated inner tube in water and look for bubbles forming on the surface.

Gather the Necessary Tools

To repair a punctured inner tube, you will need a few essential tools:

– Patch kit: A patch kit typically includes patches, sandpaper, and adhesive.
– Tire levers: These tools help you remove the tire from the rim.
– Pump: To reinflate the repaired inner tube.

Having these tools on hand will make the repair process more efficient and convenient.

Step-by-Step Repair Process

1. Remove the Wheel: Start by removing the wheel from the bike to access the punctured inner tube easily.

2. Locate the Puncture: Inflate the inner tube and identify the punctured area using soapy water or by listening for escaping air.

3. Prepare the Patch: Roughen the area around the puncture using sandpaper included in the patch kit. Apply adhesive to the patch and let it dry for a few moments.

4. Apply the Patch: Place the patch over the puncture and press firmly to ensure a secure bond. Hold the patch in place for a few minutes to allow it to adhere properly.

5. Reinstall the Inner Tube: Once the patch is securely in place, carefully insert the inner tube back into the tire and reassemble the wheel.

6. Inflate and Test: Use a pump to inflate the repaired inner tube to the recommended pressure. Check for any leaks by submerging the tube in water again. If no bubbles appear, your repair is successful.

Conclusion

Repairing a punctured inner tube is a valuable skill that every cyclist should master. With the right tools and knowledge, you can quickly fix a flat tire and continue enjoying your ride. By following the proven method outlined in this article, you can repair punctured inner tubes effortlessly and confidently. Remember to regularly check your tires for wear and tear to prevent future punctures, and always carry a patch kit for emergencies. Get back on the road with ease by mastering the art of inner tube repair.